

DIY Closet
What Trowel Size is Best for Installing 4×12 Subway Tile?


Installing subway tiles in your home can be a rewarding DIY project, enhancing both the aesthetic and functional appeal of your space. When it comes to installing 4×12 subway tiles, choosing the right trowel size is crucial for achieving optimal adhesion and a visually appealing finish. This article will guide you through the intricacies of trowel selection and other important considerations for your tiling project.
Understanding Trowels and Their Importance
A trowel is essential in the tile installation process, primarily used for spreading adhesive evenly on the substrate. Correct application of the thin-set mortar is necessary to ensure that the tiles adhere properly and avoid issues like cracking or coming loose over time. The depth and spacing of the trowel notches significantly affect how well your tiles stick, which is why selecting the correct trowel size tailored to your tile dimensions matters.
When installing 4×12 subway tiles, you are working with a specific height-to-width ratio. Choosing the right trowel size can help you overcome challenges like achieving the correct coverage and reducing the likelihood of air pockets forming under your tiles. Proper coverage ensures that your tiles will last longer by securing them firmly to the wall or floor beneath.
What Is the Optimal Trowel Size for 4×12 Subway Tiles?
For 4×12 subway tiles, the recommended trowel size is typically 1/4 x 3/8-inch square notches. This size allows for adequate adhesive application, following the surface area that the elongated tile presents. The wider notches help create a solid bond between the adhesive and tile, especially given the size and shape of the subway tile.
Using a trowel that is too small may result in inadequate adhesive coverage, leading to potential tile failure. Conversely, a trowel that is too large can create too much adhesive under the tile, causing uneven surfaces and increased drying time. It’s essential to strike a balance between the trowel size and the size of the tile to maximize adhesion without unnecessary complications.
Additional Considerations for Tile Installation
While choosing the right trowel size is crucial, several external factors can also influence your installation process. These include the type of adhesive you use, the condition of the substrate, and the room’s humidity levels.
Type of Adhesive
There are various adhesive options available for tile installation, including thin-set mortars, mastic, and epoxy. Thin-set mortar is commonly recommended for subway tiles as it offers excellent bonding properties and is suitable for wall applications. Ensure that the adhesive you select is compatible with both your tile and substrate type, as this will drastically impact the longevity of your installation.
Substrate Preparation
The substrate, which can be drywall, cement board, or other materials, should be prepared correctly before tile installation. Make sure the surface is clean, dry, and free from dust and debris. If the substrate is uneven, you may have to level it out to ensure that your tiles sit evenly, which is paramount for a successful installation.
Installation Process: Step by Step
Installing subway tiles involves several steps beyond just selecting the right trowel. Here’s a brief overview of the general process:
1. Prepare Your Materials:
Gather all necessary tools, including your trowel, tile spacers, a level, and a tile cutter. It’s also helpful to have a grout float and sponge on hand for applying grout after the tiles are installed.
2. Plan Your Layout:
Before applying adhesive, lay out your tiles on the floor or wall to determine the best pattern. This pre-planning step can help you avoid cut tiles in the corner or awkward transitions in the pattern.
3. Spread the Adhesive:
Using your selected trowel, spread the thin-set mortar over a small area of the substrate. Be sure to hold the trowel at a 45-degree angle for the best results. Use the notched edge to create grooves in the adhesive for better tile bonding.
4. Install the Tiles:
Press your tiles firmly into the adhesive, twisting slightly as you press to ensure proper contact. Use spacers to maintain consistent gaps for grout between each tile, which will help provide a professional-looking finish.
5. Cutting Tiles:
As you approach the edges or corners of the installation, you may need to cut tiles to fit. A tile cutter or wet saw is best for achieving clean cuts, allowing for a polished result in your project’s final look.
6. Grouting:
After the tiles have set for the recommended time (usually 24 hours), you can finally apply grout using a grout float. Make sure to clean any excess grout from the tile surface with a damp sponge before it dries.
Common Mistakes to Avoid
Even seasoned DIYers can run into issues when working with subway tiles. Here are a few common mistakes to avoid:
Ignoring the Substrate’s Condition
The quality of your substrate directly impacts how well your tiles adhere. Always check for moisture or structural issues within the substrate you are tiling over. If addressing these concerns seems overwhelming, consider consulting a professional for guidance.
Not Using Spacers Properly
It’s tempting to skip using spacers, especially if you’re eager to finish the job. However, using tile spacers ensures consistent spacing and proper grout lines for a professional finish. Don’t overlook this small but essential step.
Conclusion
Choosing the right trowel size—1/4 x 3/8-inch square notches—is vital for the successful installation of 4×12 subway tiles. The correct trowel ensures sufficient adhesive coverage, which is crucial for both aesthetic and functional durability. Beyond trowel selection, consider other factors such as substrate preparation, tile layout, and proper installation techniques to achieve a beautiful, lasting result in your tiling project. By adhering to these guidelines, your subway tiles will not only look stunning but will also stand the test of time.
FAQs
1. Can I use a different trowel size for 4×12 subway tiles?
Yes, while the recommended trowel size is 1/4 x 3/8-inch notches, you may adjust based on your adhesive type or the surface condition. However, ensure that the size you choose provides sufficient coverage without causing problems during installation.
2. How long should I wait before grouting?
Typically, you should wait 24 hours after installing the tiles before grouting. This allows the adhesive to cure sufficiently, ensuring a strong bond before you apply grout.
3. Can I use mastic with subway tiles?
While mastic is an option, it is generally not recommended for wet areas due to its moisture sensitivity. Thin-set mortar is usually the preferred choice for better performance and longevity in various locations.
4. How do I clean excess grout from subway tiles?
Use a damp sponge to wipe away excess grout while it’s still wet. For dried grout, you may need to use a grout haze remover or a DIY solution of vinegar and water, being careful not to damage the tiles.
5. Can I install subway tiles on painted drywall?
It is not advisable to install tiles directly on painted drywall. Instead, you should remove the paint or, ideally, use a cement backer board for the best adherence and durability in your tile installation.
This post contains affiliate links. If you purchase through these links, we may earn a small commission at no extra cost to you. Thank you for supporting Closet DIY!
Converting a spare bedroom into a walk-in closet is one of the most requested home upgrades — and one of the most misunderstood when it comes to cost. Depending on how you approach it, this project can run anywhere from a few hundred dollars to well over $15,000. The difference almost entirely comes down to how much of the room’s structure you change and whether you DIY the build-out or hire it out.
This guide breaks down every realistic cost scenario so you can budget accurately before you start — plus what it means for your home’s resale value if you’re converting a bedroom rather than a smaller closet.
Quick Cost Overview
| Approach | Typical Cost | What’s Included |
|---|---|---|
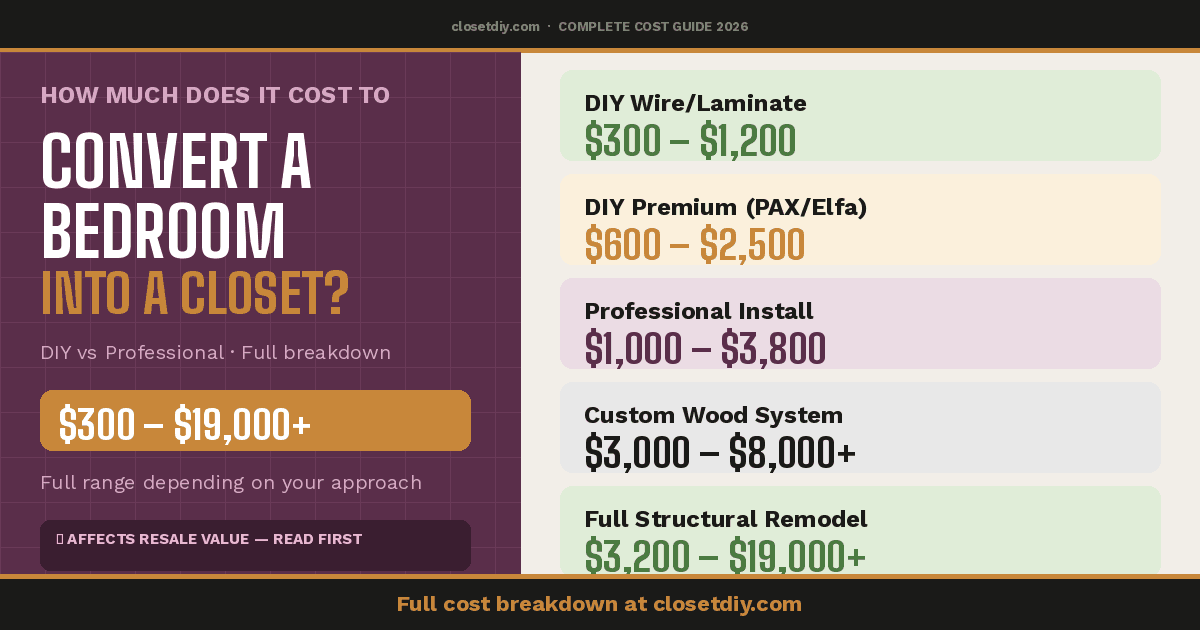
| DIY wire/laminate shelving | $300 – $1,200 | Basic shelving system, no structural work |
| DIY IKEA PAX or Elfa build | $600 – $2,500 | Premium DIY system, no structural work |
| Professional organizer install | $1,000 – $3,800 | Melamine/laminate shelving, drawers, rods |
| Custom wood closet system | $3,000 – $8,000+ | Soft-close drawers, built-in lighting, premium finish |
| Full remodel with structural changes | $3,200 – $19,000+ | New walls, electrical, flooring, lighting |
Do You Even Need Structural Changes?
The single biggest cost driver in this entire project is whether you’re simply repurposing an existing bedroom’s footprint as-is, or physically changing the room’s structure. Most bedroom-to-closet conversions fall into one of two categories:
Category 1: No Structural Changes (Most Common, Most Affordable)
You keep the room’s existing walls, door, and layout exactly as they are — you’re just filling the room with closet systems instead of bedroom furniture. This is by far the most budget-friendly approach and is entirely achievable as a DIY project over one or two weekends.
Category 2: Structural Changes (Higher Cost, Often Needs a Pro)
This includes removing or adding walls to change the room’s shape, moving the door, or converting a closet-less room into a walk-in by expanding into an adjacent space. Expanding a closet by moving or removing a wall typically adds $2,000 to $6,000 for framing, drywall, and finishing, plus $500 to $1,500 for electrical rerouting if outlets or switches are affected. If you’re converting a small reach-in into a true walk-in, you’ll generally need at least 25 to 30 square feet of floor space to make it functional.
💡 Most affordable path: If your spare bedroom is already a reasonable size and shape, skip structural changes entirely and put your full budget toward the closet system itself. This alone can cut your total cost by thousands of dollars.
Full Cost Breakdown by Approach
1. DIY Wire or Laminate Shelving — $300 to $1,200
The most budget-friendly path. A basic wire shelving system from a home improvement store costs $50 to $200 in materials for a single wall; outfitting a full room on all available walls typically lands in the $300 to $1,200 range depending on room size. This is a realistic single-weekend DIY project requiring only basic tools.
See our guides: Best Closet Organizers Under $200 and 15 Small Closet Organization Ideas.
2. DIY Premium System (IKEA PAX or Elfa) — $600 to $2,500
Stepping up to a premium modular system like IKEA PAX or Elfa gives you a genuinely custom-looking result while remaining a DIY project. A full room outfitted with PAX frames and KOMPLEMENT accessories typically runs $600 to $1,500 in materials; a comparable Elfa wall-mounted setup runs $1,500 to $2,500 installed for a larger room.
Full guides: How to Build a Walk-In Closet with IKEA PAX and Elfa vs Container Store vs IKEA PAX.
3. Professional Organizer Installation — $1,000 to $3,800
Hiring a professional closet installer for melamine or laminate shelving with drawers and hanging rods typically runs $1,000 to $3,800, with most homeowners landing around $2,128 on average. Basic white or oatmeal laminate systems price out at roughly $125 per linear foot — a typical 6×6 ft walk-in has about 18 linear feet of wall space, putting a basic laminate build around $2,250.
4. Custom Wood Closet System — $3,000 to $8,000+
For soft-close drawers, jewelry inserts, built-in lighting, and a genuinely premium wood finish, expect $3,000 to $8,000 or more depending on closet size and finish quality. Upgrading to a wood finish with custom molding on a 6×6 ft closet pushes cost toward $5,000; larger 33-linear-foot closets in this tier run $4,000 to $8,000.
5. Full Remodel With Structural Changes — $3,200 to $19,000+
A comprehensive overhaul — custom storage, new lighting, flooring, paint, and structural wall changes — typically runs $3,200 to $19,345, averaging around $8,781. On the extreme high end, a total revamp with significant structural changes can run up to $22,000.
Cost Per Square Foot — Quick Reference
If you want a fast, rough estimate based on your room’s size, use these per-square-foot ranges:
- Basic laminate/melamine: $25 – $125 per sq ft
- Wood veneer (mid-range): $75 – $160 per sq ft
- High-end custom finish: $150+ per sq ft
For example, a 100-square-foot converted bedroom closet using standard materials typically runs $2,500 to $5,000 total. The same room with high-end finishes and premium extras can exceed $15,000.
💡 Use our free tool: Get a personalized estimate for your specific room dimensions with the Closet Cost Calculator — it takes under a minute.
Additional Costs People Forget to Budget For
- Lighting: $80 – $250 for battery/LED options; $500+ if hardwiring new fixtures
- Flooring: $3 – $20 per square foot depending on material — many people upgrade flooring when converting a full bedroom
- Paint: $40 – $120 in materials for a full room
- Door replacement or removal: $273 – $1,799, averaging around $798, if you’re changing the door style (see our Closet Door Types Guide)
- Demolition or removal of existing closet/furniture built-ins: $200 – $800
- Home organizer consultation: $40 – $60 per hour if you want professional layout advice without a full installation
🛒 Budget-friendly upgrades: Motion-Activated LED Closet Light | Peel-and-Stick Vinyl Flooring Planks
DIY vs Hiring a Professional
When DIY Makes Sense
If you’re not changing the room’s structure — no new walls, no moved doors, no rerouted electrical — this is a very achievable DIY project. Installing a wire, laminate, or PAX/Elfa system yourself can save 50% or more compared to hiring a professional installer, and most of these systems are designed for exactly this kind of self-installation.
When to Hire a Professional
Bring in a licensed contractor if your project involves any of the following:
- Moving or removing walls
- Adding or relocating electrical outlets, switches, or hardwired lighting
- Structural changes to accommodate a larger closet footprint
- Custom cabinetry requiring precision cuts and built-in fitting
General contractors typically charge a per-project fee of 10% to 25% of the total project cost on top of materials and subcontractor costs, so factor that into your budget if structural work is required.
Does Converting a Bedroom into a Closet Hurt Resale Value?
This is one of the most important questions to consider before starting this project — and the answer depends heavily on your local market.
Converting a bedroom into a closet reduces your home’s official bedroom count, which can meaningfully affect appraised value and buyer pool. Real estate listings are frequently searched by bedroom count, so going from a 4-bedroom to a 3-bedroom listing can narrow your pool of interested buyers, even if the overall square footage stays the same.
On the flip side, the reverse project — adding a closet to convert a non-bedroom space into a legal bedroom — can boost appraised value by as much as $30,000 in some markets, which tells you how much weight bedroom count carries.
Ways to Protect Your Resale Value
- Choose a reversible approach. A DIY shelving or PAX/Elfa system can be fully removed in a weekend if a future buyer (or you) wants the room back as a bedroom. Structural changes are far harder to undo.
- Only convert a true “extra” bedroom. If your home has 4+ bedrooms, converting one to a closet is much less risky than doing so in a 2 or 3-bedroom home.
- Keep a closet door on the room. Removing the closet door entirely can make it harder for a future buyer or appraiser to recognize the room’s potential to convert back to a bedroom.
- Consider your timeline. If you plan to sell within a few years, weigh the lifestyle benefit against the resale impact carefully. If this is a forever home, resale impact matters far less.
Step-by-Step Budget Planning Process
- Measure your room — width, depth, and ceiling height at multiple points
- Decide: structural changes or not? This single decision determines which cost tier you’re in
- Choose your system tier — wire/laminate, premium DIY (PAX/Elfa), professional install, or full custom
- Use the Closet Cost Calculator to get a personalized estimate for your specific dimensions
- Add 15-20% contingency to whatever number you land on — unexpected costs (electrical surprises, material price changes, additional trim) are the norm, not the exception
Real-World Budget Examples
Budget Example: Small Spare Room, DIY, No Structural Changes
10×10 ft room, wire shelving on two walls, basic LED lighting, no flooring change: ~$500 – $900 total
Mid-Range Example: Spare Bedroom, DIY Premium System
10×10 ft room, IKEA PAX on three walls, KOMPLEMENT drawers, battery LED lighting, fresh paint: ~$1,400 – $2,200 total
High-End Example: Full Custom Remodel
12×12 ft room, custom wood cabinetry, hardwired lighting, new flooring, professional installation: ~$7,000 – $12,000 total
Frequently Asked Questions
How much does it cost to convert a bedroom into a walk-in closet?
It depends heavily on your approach. A DIY conversion with no structural changes typically costs $300 to $2,500 depending on the shelving system you choose. A professionally installed system runs $1,000 to $3,800. A full custom remodel with structural changes can run $3,200 to $19,000 or more.
Does converting a bedroom to a closet lower my home’s value?
It can, primarily because it reduces your home’s official bedroom count, which affects how the property appears in real estate searches. The impact varies by market and depends on how many bedrooms your home has overall — converting one of five bedrooms is far less risky than converting one of two. A reversible, non-structural conversion also protects you, since it can be undone by a future owner.
Do I need a permit to convert a bedroom into a closet?
In most cases, no permit is needed if you’re not changing the room’s structure, electrical, or plumbing — you’re simply adding shelving and storage systems. If you’re moving walls, adding electrical circuits, or changing the door opening, check with your local building department, as these changes may require a permit.
What’s the cheapest way to convert a bedroom into a closet?
DIY wire or laminate shelving is the most affordable route, typically costing $300 to $1,200 for a full room with no structural changes required. Combine this with our Best Closet Organizers Under $200 guide to maximize value.
How long does a bedroom-to-closet conversion take?
A DIY conversion with no structural changes typically takes one to two weekends. Professional installations of pre-made systems usually take one to three days. Full custom remodels with structural changes can take several weeks depending on the scope of construction work involved.
Can I convert the closet back into a bedroom later?
Yes, easily, if you avoided structural changes — simply remove the closet system and the room returns to a standard bedroom. This is one of the strongest arguments for choosing a DIY, non-structural approach if there’s any chance you’ll want the bedroom back in the future.
This post contains affiliate links. If you purchase through these links, we may earn a small commission at no extra cost to you. This never affects our recommendations — we only link to products we genuinely trust.
This post contains affiliate links. If you purchase through these links, we may earn a small commission at no extra cost to you. Thank you for supporting Closet DIY!
Once you’ve outgrown budget wire shelving and you’re ready to invest in a real closet system, two names come up again and again: Elfa from The Container Store, and IKEA PAX. Both are considered premium-tier DIY-friendly systems, both have passionate fans, and both can transform a chaotic closet into something that looks genuinely custom.
But they work in fundamentally different ways — and the right choice depends heavily on your budget, your walls, and whether you plan to stay in your home long-term. Here’s the complete comparison.
Quick Answer: Elfa vs IKEA PAX at a Glance
| Feature | Elfa (Container Store) | IKEA PAX |
|---|---|---|
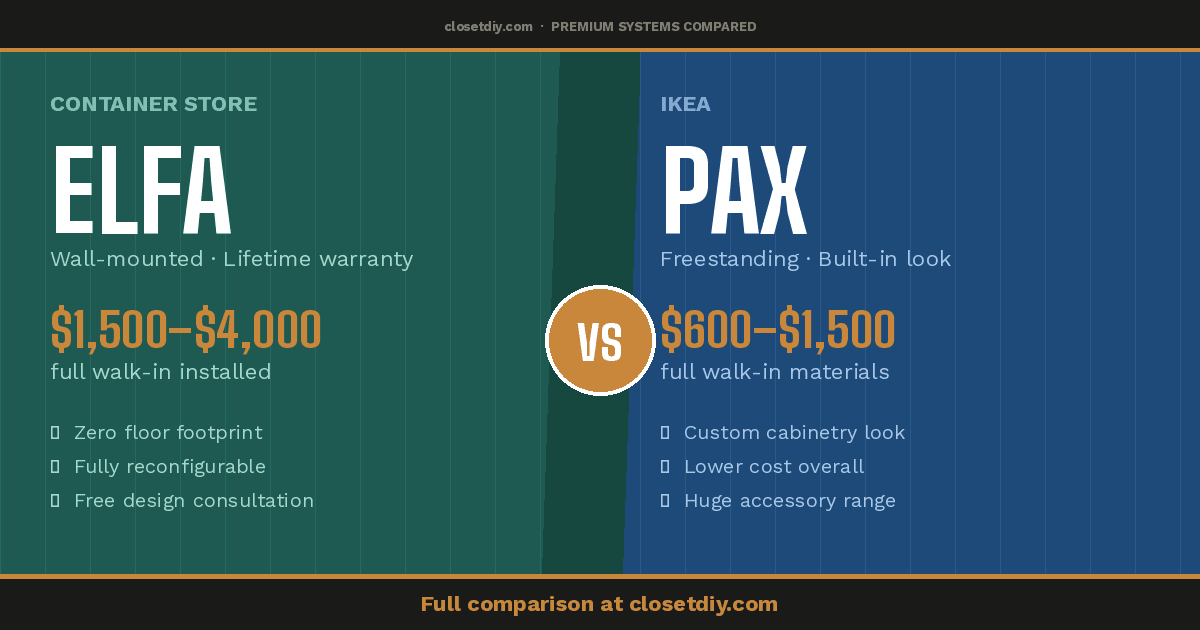
| Price range | $228 – $5,300+ | $13 – $2,145 |
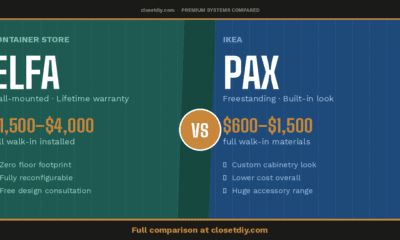
| Full walk-in closet | $1,500 – $4,000 installed | $600 – $1,500 materials |
| Mounting style | Wall-mounted rail system | Freestanding boxed frames |
| Floor footprint | None — fully wall-hung | Sits on the floor |
| Reconfigurability | Excellent — move components anytime | Limited once assembled |
| Warranty | Lifetime | Standard IKEA warranty (varies) |
| Design help | Free in-store consultation | Free online PAX Planner |
| Available at | The Container Store, online | IKEA stores, IKEA.com |
What Is Elfa?
Elfa is a wall-mounted shelving system sold exclusively through The Container Store, available in the Decor+ Elfa collection. The core design principle is simple but effective: a horizontal wall standard rail mounts to studs or with heavy-duty anchors, and every shelf, drawer, basket, and hanging rod hangs from that rail using clip-in brackets.
Because everything hangs from the wall rail rather than sitting on the floor, Elfa has zero floor footprint — the entire system floats above the ground. This makes a closet feel more open and means you can vacuum or mop underneath the whole system without moving anything.
Elfa comes in three main styles:
- Elfa Classic — the original wire shelving line, most affordable
- Elfa Décor — wood-look laminate shelving with a more finished appearance
- Elfa Utility — heavy-duty option designed for garages and utility spaces
🛒 Shop Elfa-style components on Amazon: Wall-Mounted Closet Rail System | Wire Shelf Baskets (Elfa-compatible style)
What Is IKEA PAX?
IKEA PAX is a modular wardrobe and closet system built from freestanding boxed frames that sit on the floor. Unlike Elfa’s open rail concept, PAX frames are fully enclosed cabinets — essentially furniture — that can be arranged side by side to build out a full wall of closet storage, or combined in L-shape and U-shape configurations for walk-in closets.
PAX’s biggest strength is its enormous range of KOMPLEMENT interior accessories — drawers, pull-out trays, shoe racks, glass shelves, and clothes rails — all designed to snap into standard PAX frame sizes.
For the full installation walkthrough, see our guide: How to Build a Walk-In Closet with IKEA PAX.
🛒 Shop PAX accessories on Amazon: IKEA SKUBB Storage Organizers (fits PAX interiors)
Price Comparison
Elfa Pricing
Elfa components are sold individually, so total cost scales with how much of the system you build out. Individual pieces range from $228 to over $5,300 for a fully loaded custom design. As a practical guide:
- Reach-in closet conversion: $600 – $1,200 installed
- Full walk-in closet: $1,500 – $4,000 installed, depending on size and configuration depth
- Premium drawer units and Décor finishes push costs toward the higher end of these ranges
💡 Money-saving tip: The Container Store runs an Elfa sale of roughly 25 to 30 percent off once per year, typically in January. If your timeline allows it, waiting for this sale can meaningfully cut your total cost.
IKEA PAX Pricing
PAX pricing is generally lower at every tier. Individual accessories start as low as $13, while expansive walk-in configurations can run up to roughly $2,145 — though many substantial full-closet setups land well under $600 for the frames alone before accessories.
- Single frame: $100 – $200
- Full reach-in setup: $300 – $500 with accessories
- Walk-in closet setup: $600 – $1,500+ with a full KOMPLEMENT interior
💡 Budget verdict: IKEA PAX is meaningfully less expensive at every tier — often by half or more for a comparable walk-in setup. If cost is your primary constraint, PAX wins clearly.
Installation: Which Is Easier?
Elfa Installation
Elfa installation centers on getting the wall standard rail perfectly level and securely anchored — everything else clips on afterward. Because the rail must support the full weight of everything hung from it, anchoring into studs (or using rated heavy-duty anchors) is non-negotiable.
Once the rail is up, adding and rearranging shelves, baskets, and drawers takes minutes with no additional tools or drilling — this is Elfa’s single biggest practical advantage over PAX.
IKEA PAX Installation
PAX installation is a larger initial project — you’re assembling and standing up full cabinet frames, then leveling and anchoring each one before adding interior accessories. A typical multi-frame walk-in setup takes a full day with two people. For the complete step-by-step process, see our IKEA PAX installation guide.
💡 Installation verdict: Elfa has an easier ongoing experience — once the rail is mounted, changes are quick and tool-free. PAX requires more upfront assembly work but results in a more finished, furniture-like structure.
🛒 Essential tools for either system: Stud Finder | Self-Leveling Laser Level
Flexibility and Reconfigurability
This is where Elfa’s design philosophy really shines. Because every component clips onto the wall rail rather than being permanently assembled, you can move shelves, add a hanging rod, swap in a drawer unit, or completely redesign the interior layout in minutes — without removing anything from the wall or buying new hardware.
This matters more than it might seem. If you move, Elfa components can come with you and be reinstalled in a new home. If your storage needs change — say, you go from mostly-hanging to mostly-folded clothing — Elfa adapts in an afternoon.
PAX, by contrast, is far more permanent once built. You can rearrange interior accessories (shelves, drawers, rails) within a frame, but the frames themselves are effectively fixed once anchored to the wall. Reconfiguring a full PAX layout means largely disassembling and rebuilding it.
💡 Flexibility verdict: Elfa wins decisively if you value long-term adaptability or think you might move. PAX is better suited to a “build it once and leave it” approach.
Aesthetics: Which Looks Better?
Both systems can look genuinely premium — but they achieve it differently.
Elfa’s open, airy wire-and-rail design gives closets a modern, minimalist feel, though the base wire shelving can look somewhat utilitarian without upgrading to the Décor wood-look line. Many owners find the ventilated wire shelves practical but add wood tops or drawer fronts to soften the look.
PAX, with its enclosed cabinet frames and door options, delivers a sleek, built-in look that’s hard to match at this price point. Adding sliding mirrored or glass doors to a PAX installation can elevate a room dramatically, and with trim and crown molding (see our PAX finishing guide), it can pass convincingly as custom millwork.
💡 Aesthetics verdict: It’s close. PAX generally achieves a more “built-in” custom look out of the box; Elfa achieves a more modern, open feel that some homeowners prefer, especially with the Décor upgrade.
Design Help and Planning Tools
The Container Store offers a free in-store design consultation for Elfa projects — a consultant helps optimize your specific space, which is a meaningful advantage if you’re not confident planning a layout yourself. Their online design tool is also available for remote planning.
IKEA offers the free online PAX Planner, which lets you build your layout digitally before buying. It’s a capable tool, though some users find it less intuitive than working with a live consultant.
You can also use our own free Closet Cost Calculator to get a fast budget.
Warranty and Long-Term Durability
Elfa is backed by a lifetime warranty through The Container Store — a strong signal of the brand’s confidence in its hardware, and valuable if you plan to stay in your home for many years.
IKEA PAX carries IKEA’s standard product warranty, which varies by component but is generally shorter than Elfa’s lifetime coverage. In practical terms, PAX frames and drawer boxes are typically expected to perform well for 7 to 12 years under normal use, while Elfa’s metal rail-and-bracket hardware tends to outlast that timeframe significantly, especially the wire shelving components.
Who Should Choose Elfa?
Elfa is the right choice if you:
- ✅ Want the ability to reconfigure your closet layout over time without rebuilding
- ✅ Think you might move and want to bring your closet system with you
- ✅ Prefer zero floor footprint for easier cleaning and a more open feel
- ✅ Value a lifetime warranty and long-term durability
- ✅ Want the option of a free professional design consultation
- ✅ Have a larger budget ($1,500+) for a full walk-in closet
Who Should Choose IKEA PAX?
IKEA PAX is the right choice if you:
- ✅ Want the most built-in, custom-cabinetry look for your budget
- ✅ Are working with a tighter budget ($600 – $1,500 for a walk-in)
- ✅ Plan to stay in your current home long-term and don’t need to relocate components
- ✅ Want a huge range of interior accessory options (KOMPLEMENT)
- ✅ Prefer a one-time build rather than an evolving, reconfigurable system
- ✅ Live near an IKEA store for easy access to parts and returns
What About Combining the Two?
Some homeowners use both systems together — PAX frames as the main structural element for the premium look on the primary wall, with Elfa’s wall-mounted rail system supplementing a secondary wall or awkward corner where a full frame won’t fit. This hybrid approach can capture PAX’s aesthetic impact where it matters most while using Elfa’s flexibility in tighter or irregular spaces.
Our Final Verdict
Choose Elfa if: you value long-term flexibility, might move, want a lifetime warranty, and have a bit more budget to work with.
Choose IKEA PAX if: you want the best possible built-in look for your money, you’re working with a tighter budget, and you’re planning a one-time build in a home you’re staying in.
Neither system is objectively “better” — they’re built around different philosophies. Elfa optimizes for adaptability; PAX optimizes for a finished, custom look at a lower price. Match the system to how you actually plan to live in the space.
Recommended Products
- 🛒 Wall-Mounted Closet Rail System — Elfa-style wall rail shelving for a reconfigurable setup.
- 🛒 IKEA SKUBB Storage Organizers — The cheapest way to add internal fabric compartments to existing PAX frames.
- 🛒 Self-Leveling Laser Level — Essential for both Elfa rail mounting and PAX frame installation.
- 🛒 Stud Finder — Critical for safely anchoring either system into your walls.
Frequently Asked Questions
Is Elfa more expensive than IKEA PAX?
Yes, generally. A full walk-in closet in Elfa typically runs $1,500 to $4,000 installed, while a comparable IKEA PAX walk-in setup runs $600 to $1,500 in materials. Elfa’s individual components also range higher, from $228 up to over $5,300 for a fully loaded custom design.
Can I install Elfa myself?
Yes. The wall rail must be anchored into studs or rated heavy-duty anchors, which is the most critical step, but once that’s done, shelves, baskets, and drawers clip on without additional tools. Most homeowners can complete a standard Elfa installation in a single day.
Does Elfa or PAX look more expensive?
PAX generally achieves a more “built-in cabinetry” look out of the box, especially with doors and trim added. Elfa’s base wire shelving looks more utilitarian unless upgraded to the Décor wood-look line, though its open design gives closets a modern, airy feel that some homeowners prefer.
Which system is better if I rent my home?
Elfa has an advantage here since components can be unmounted and taken with you when you move, provided you patch the wall anchor holes. PAX frames are heavier and more integrated into the space, making them less practical to relocate, though not impossible with enough effort.
Does The Container Store ever put Elfa on sale?
Yes — The Container Store typically runs an Elfa sale of 25 to 30 percent off once per year, usually in January. If your project timeline is flexible, planning your purchase around this sale can meaningfully reduce your total cost.
Can I mix Elfa and IKEA PAX in the same closet?
Yes, and some homeowners do exactly this — using PAX frames on the main wall for the built-in look, and Elfa’s wall-mounted rail system in a secondary area or awkward corner where a full frame doesn’t fit well.
This post contains affiliate links. If you purchase through these links, we may earn a small commission at no extra cost to you. Thank you for supporting Closet DIY!
The closet door is the part of a closet project everyone underestimates. You spend weeks planning shelving, rods, and drawers — then grab whatever door looks fine at the store without realizing it will affect how much of your closet you can actually reach, how much floor space you lose, and how much the whole project costs.
There are six main types of closet doors, and each one is genuinely the right choice for a different situation. This guide breaks down exactly how each type works, what it costs, and which one fits your space — so you can choose with confidence instead of guessing.
Closet Door Types at a Glance
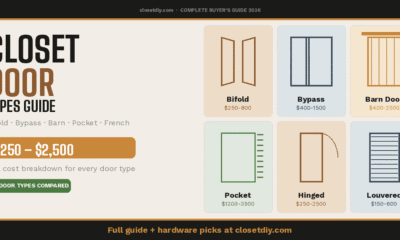
| Door Type | Best For | Full Access? | Cost (Installed) |
|---|---|---|---|
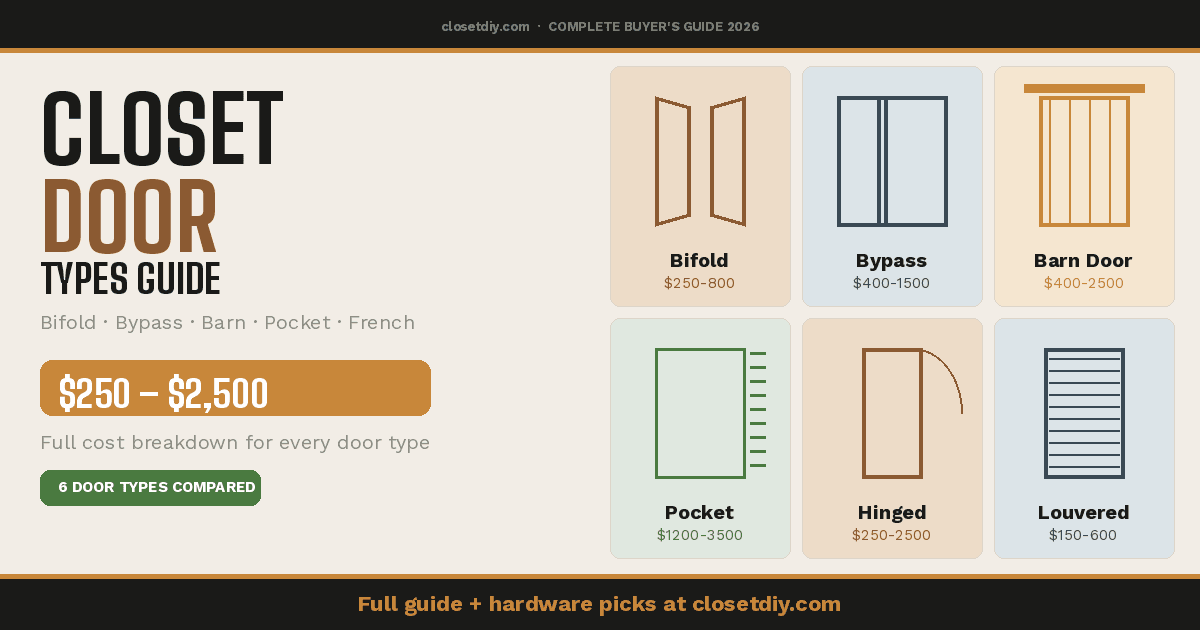
| Bifold | Standard reach-in closets | Yes | $250 – $800 |
| Bypass (sliding) | Wide closets, tight rooms | Half at a time | $400 – $1,500 |
| Barn door | Statement / design focal point | Yes | $400 – $2,500 |
| Pocket door | Zero visible footprint | Yes | $1,200 – $3,500 |
| Hinged / French | Walk-in closets, wide openings | Yes | $250 – $2,500+ |
| Louvered | Closets needing airflow | Yes | $150 – $600 |
1. Bifold Doors — The Standard Choice
Bifold doors are the most common closet door style in North American homes, and for good reason. Two panels are hinged together in the middle so they fold like an accordion and tuck to the side of the frame when opened, giving you full access to the closet opening while taking up minimal swing space.
Pros
- Full access to the entire closet opening when open
- Most affordable option — $250 to $800 installed for a standard pair
- Widely available in standard sizes at any home improvement store
- Simple DIY installation if replacing an existing bifold with the same size
Cons
- Prone to popping off the bottom pivot track if not installed correctly or if the track wears out
- Leaves a visible center gap between panels where dust can enter
- Folding panels can feel less premium than other styles
Best For
Standard reach-in closets, kids’ rooms, guest rooms, and any budget-conscious closet upgrade. If you’re replacing worn-out bifold doors with the same size, this is one of the easiest weekend swaps in home improvement.
🛒 Shop bifold doors and hardware: Bifold Closet Door (Standard White, 2-Panel) | Bifold Door Track & Pivot Hardware Kit | Replacement Bottom Pivot Kit
2. Bypass (Sliding) Doors — Best for Tight Rooms
Bypass doors — sometimes just called sliding closet doors — use two or more panels that hang from an overhead track and slide behind one another. Unlike bifold doors, they require zero floor clearance to operate, which makes them ideal for rooms where furniture or walking space is tight right in front of the closet.
Pros
- No floor clearance needed to open — perfect for small bedrooms
- No swing radius to plan around
- Available in mirrored finishes, which double as a full-length mirror
- Clean, simple look that works with most interior styles
Cons
- Only gives access to one side of the closet at a time
- Panels can be heavy, especially mirrored versions, and require sturdy track hardware
- Track can accumulate dust and debris over time, causing sticking
Best For
Small bedrooms, hallway closets, and anywhere floor space in front of the closet is at a premium. Mirrored bypass doors are also a popular way to add a full-length mirror without using any wall space.
🛒 Shop bypass door hardware: Bypass Sliding Door Track Kit | Mirrored Bypass Closet Door
3. Barn Doors — The Design Statement
Barn doors have surged in popularity over the past several years as a design-forward alternative to traditional closet doors. A barn door mounts on an exposed track above the door opening and slides along the wall surface rather than folding or sliding within the frame.
Pros
- Strong visual impact — often becomes a focal point of the room
- No floor track to maintain or clean
- Wide range of styles: rustic wood, modern glass, black metal frames
- Works well when there’s no wall cavity available for a pocket door
Cons
- Requires wall space equal to the door width on one side of the opening
- Leaves a visible gap of about a half-inch to an inch between door and wall, reducing privacy and sound blocking
- Track must be anchored into a structural header or solid blocking between studs — a single door panel can weigh 60 to 120 lbs
- More expensive than bifold or bypass in most cases
Cost Breakdown
- Single barn door: $400 – $1,400 installed
- Double barn doors: $800 – $2,800 installed
- Bypass-style barn doors (2+ panels on parallel tracks): $500 – $1,500 installed
💡 Pro Tip: Standard hardware kits include a steel track rated for 150 to 300 lbs, roller hangers, floor guides, and mounting brackets. Always confirm your track is rated well above your door’s actual weight — this isn’t a place to cut corners.
🛒 Shop barn door hardware: Sliding Barn Door Hardware Kit (Heavy Duty) | Barn Door Soft-Close Kit | Barn Door Floor Guide
4. Pocket Doors — The Invisible Option
A pocket door slides directly into a hollow cavity built into the wall, disappearing completely when open. When closed, it looks and functions like a normal swinging door, but takes up zero floor space and requires no swing radius at all.
Pros
- Completely invisible when open — the cleanest possible look
- Zero floor space required, unlike every other door type
- Ideal where furniture placement or walking paths can’t accommodate any door swing or slide-by clearance
Cons
- By far the most expensive and invasive option to install in an existing wall
- Retrofitting into an existing wall requires removing drywall, modifying structural framing, and sometimes rerouting electrical wiring
- Not a realistic weekend DIY project unless the wall cavity is already prepped
Cost Breakdown
New pocket door installation in an existing wall typically runs $1,200 to $3,500 depending on hardware quality and whether the wall needs structural modification. This is almost always a job best suited to a professional unless you’re already doing a larger renovation with the wall open.
Best For
New construction or major renovations where the wall is already open, tight spaces where literally no door swing can be accommodated, and homeowners prioritizing a seamless, doorless look when the closet is open.
5. Hinged and French Doors — The Traditional Choice
Hinged closet doors operate like a standard interior door, attached to the frame with hinges and swinging open into the room. French doors are a variation where two hinged doors meet at the center and swing outward, often used for wider walk-in closet openings.
Pros
- Solid, quiet operation with no tracks or rollers to maintain
- Full access to the closet opening
- Available in the widest range of materials — solid wood, glass inserts, panel styles
- Best sound and light blocking of any door type when properly weatherstripped
Cons
- Requires a swing radius in the room — not ideal for tight bedrooms
- Can conflict with furniture placement if not planned carefully
- Heavier and more expensive than bifold or bypass for the same opening width
Best For
Walk-in closets where the door swing doesn’t conflict with furniture or foot traffic, and anywhere you want a more premium, traditional look. This is also the best choice if you want the option to add glass panel inserts for a boutique-style closet reveal.
🛒 Shop hinged door hardware: Interior Door Hinges (Heavy Duty, 3-Pack) | French Door Handle Set
6. Louvered Doors — Built for Airflow
Louvered doors feature horizontal slats that allow air to pass through while still providing visual coverage. This makes them the clear choice for any closet housing equipment that generates heat or needs ventilation.
When You Need Louvered Doors
If the closet houses a water heater, HVAC air handler, or washer/dryer, louvered bifold doors allow airflow that prevents moisture buildup and provides necessary combustion air. Solid panel doors in these locations can trap humidity and heat — a real problem for both equipment lifespan and mold prevention.
Pros
- Only door type that provides meaningful ventilation
- Available in bifold or hinged configurations
- Prevents moisture and heat buildup in equipment closets
Cons
- Provides zero sound blocking or privacy
- Not suitable for clothing closets where you want a finished, clean look
- Slats can collect dust and require more frequent cleaning
Best For
Utility closets, laundry closets, water heater closets, and any space with equipment that needs to breathe. Never use solid panel doors on a closet housing a gas water heater or furnace — check your local code, as ventilation is often a safety requirement, not just a preference.
Standard Closet Door Sizes
Closet door sizes are based on the finished opening — after drywall and trim — not the rough framing opening. Getting this measurement right before you shop saves a return trip to the store.
- Single bifold: 24 in wide openings
- Double bifold: 48 in wide openings
- Bypass doors: 60 in or 72 in wide openings
- Standard height: almost always 80 inches
If your opening is non-standard, some bifold doors can be trimmed up to 1 inch on each side. For anything more unusual, you’ll need a custom order — expect custom doors to cost 2 to 4 times more than a stock size.
Full Cost Comparison Table
| Door Type | Door Only | Installed (Total) |
|---|---|---|
| Standard hollow-core panel | $50 – $200 | $250 – $750 |
| Bifold (basic) | $80 – $300 | $250 – $800 |
| Bypass / sliding | $150 – $600 | $400 – $1,500 |
| Barn door (single) | $200 – $900 | $400 – $1,400 |
| Barn door (double) | $400 – $1,600 | $800 – $2,800 |
| Pocket door | N/A (wall install) | $1,200 – $3,500 |
| Louvered | $100 – $400 | $150 – $600 |
| Custom / glass | $1,000 – $3,300 | $1,200 – $5,800 |
Which Closet Door Should You Choose?
Use this quick decision guide based on your specific situation:
- Tightest budget: Standard bifold doors — the cheapest option that still gives full closet access
- Small bedroom, no room for door swing: Bypass sliding doors
- Want a design statement piece: Barn door
- Zero visible footprint, doing a bigger renovation: Pocket door
- Walk-in closet, want a premium traditional look: Hinged or French doors
- Closet with a water heater, furnace, or washer/dryer: Louvered doors — this isn’t optional, it’s often a safety requirement
DIY or Hire a Professional?
If you’re simply swapping old bifold panels for new ones of the exact same size using the existing track, the DIY route is highly accessible — you’ll need just a screwdriver, a tape measure, and a level.
However, if you’re installing a prehung door, retrofitting a slab into an old frame, or setting up a heavy barn door track, the project becomes significantly more complex and may be worth hiring out — especially for barn doors, where the track must be anchored into structural framing to safely support 60 to 120 lbs of hanging door weight.
Pocket doors should almost always be left to a professional unless you’re already working with an open wall as part of a larger renovation.
Plan Your Full Closet Project
Choosing your door is just one piece of the puzzle. Use our free Closet Cost Calculator to estimate your total project budget including shelving, rods, and drawers completely free.
Check out our related guides for more on planning your closet build:
- What Is the Ideal Rough Opening Size for Bypass Doors?
- ClosetMaid vs IKEA PAX — Which Is Better for Your Budget?
- How to Build a Walk-In Closet with IKEA PAX
Frequently Asked Questions
What is the most affordable closet door type?
Standard bifold doors are the most affordable option, typically costing $250 to $800 installed for a standard pair. Basic hollow-core panel doors can be even less expensive, starting around $250 installed.
What closet door is best for a small bedroom?
Bypass sliding doors are usually the best choice for small bedrooms since they require zero floor clearance to open — unlike bifold or hinged doors, which need swing or fold space in the room.
Do barn doors provide privacy?
Not completely. Barn doors typically leave a gap of about a half-inch to one inch between the door and the wall, which reduces both privacy and sound blocking compared to a bifold, hinged, or pocket door.
Can I install a barn door myself?
Yes, if you have basic DIY skills and the right tools — but the track must be anchored into a structural header or solid blocking between wall studs, since a single door panel can weigh 60 to 120 lbs. Skipping this step is a common and serious mistake. If you’re not confident locating solid framing, this is worth hiring out.
Why do bifold doors keep falling off the track?
This usually happens when the bottom pivot — a small plastic or metal guide that rides in a floor-mounted track — wears out or breaks. Replacement pivot kits are inexpensive and take about 15 minutes to install, and are worth trying before replacing the entire door.
What type of door should I use for a closet with a water heater?
Louvered doors, which allow airflow through horizontal slats. Solid panel doors can trap heat and humidity around equipment like water heaters, furnaces, and HVAC air handlers — check your local building code, as ventilation is sometimes a safety requirement rather than just a preference.
This post contains affiliate links. If you purchase through these links, we may earn a small commission at no extra cost to you. This never affects our recommendations — we only link to products we genuinely trust.

How Much Does It Cost to Convert a Bedroom into a Walk-In Closet? (2026)

Elfa vs Container Store vs IKEA PAX: Which Closet System Wins?

Closet Door Types: Bifold vs Sliding vs Barn vs Bypass (Complete Guide)

Best Closet Rod & Bracket Systems — Complete Buyer’s Guide (2026)

15 Small Closet Organization Ideas That Actually Double Your Storage
How Much Does It Cost to Convert a Bedroom into a Walk-In Closet? (2026)
This post contains affiliate links. If you purchase through these links, we may earn a small commission at no extra...
Elfa vs Container Store vs IKEA PAX: Which Closet System Wins?
This post contains affiliate links. If you purchase through these links, we may earn a small commission at no extra...
Closet Door Types: Bifold vs Sliding vs Barn vs Bypass (Complete Guide)
This post contains affiliate links. If you purchase through these links, we may earn a small commission at no extra...
Best Closet Rod & Bracket Systems — Complete Buyer’s Guide (2026)
This post contains affiliate links. If you purchase through these links, we may earn a small commission at no extra...
15 Small Closet Organization Ideas That Actually Double Your Storage
This post contains affiliate links. If you purchase through these links, we may earn a small commission at no extra...
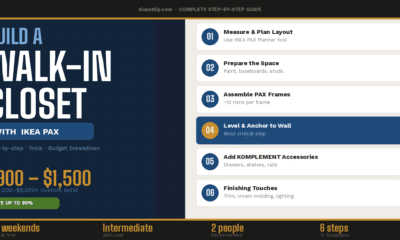

How to Build a Walk-In Closet with IKEA PAX — Step by Step Guide
This post contains affiliate links. If you purchase through these links, we may earn a small commission at no extra...
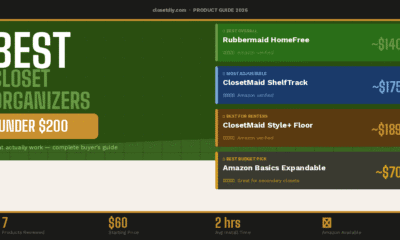

Best Closet Organizers Under $200 That Actually Work (2026 Guide)
This post contains affiliate links. If you purchase through these links, we may earn a small commission at no extra...
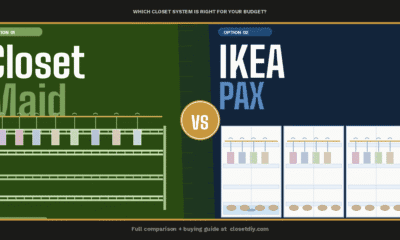

ClosetMaid vs IKEA PAX: Which Closet System Is Better for Your Budget?
This post contains affiliate links. If you purchase through these links, we may earn a small commission at no extra...
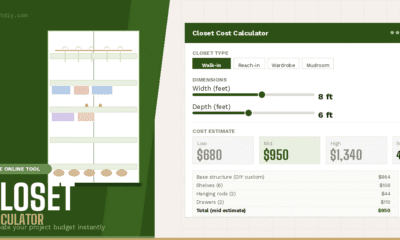

Free Closet Cost Calculator — Estimate Your Project Budget Instantly
This post contains affiliate links. If you purchase through these links, we may earn a small commission at no extra...


Is It Safe to Have a Water Heater in the Attic? Everything Homeowners Need to Know
Having a water heater in the attic is more common than you might think — especially in Southern states where...

 DIY Closet3 years ago
How to troubleshoot and reset the red light on your Aquaguard AG 3000E

 DIY Closet3 years ago
How to Install a Drop-In Sink Without Clips: A Step-by-Step Guide

 Bug Fixing2 years ago
Understanding the Cost of Furnace Collector Box Replacement: What to Expect

 DIY Closet3 years ago
Pergola Design: Understanding the Maximum Span for 6×6 Beams

 DIY Closet3 years ago
The Best Nails for Luan: A Comprehensive Guide

 Bug Fixing3 years ago
Pigtail vs Daisy Chain Outlets: Which is Better for Your Home?

 DIY Closet3 years ago
How to Build a Free Standing 6×6 Post Swing Set: A Step-by-Step Guide

 DIY Closet3 years ago
Understanding the Benefits of a 400 Amp Meter Base with Two 200 Amp Disconnects