

Home Storage & Organization
Maximizing Space: The Ultimate Guide to Organizing and Customizing Your Reach-In Closet

Reach-in closets are a staple in many homes, offering a compact yet efficient storage solution for clothing and accessories. Unlike walk-in closets, these are designed for easy access without stepping inside, making them ideal for rooms with limited space. With thoughtful design and organization, reach-in closets can be transformed to maximize storage and enhance the aesthetics of your space.
Understanding Reach-In Closets
A reach-in closet is typically a shallow, enclosed space integrated into a wall, allowing users to access their belongings by reaching in rather than walking in. Commonly found in bedrooms, hallways, and entryways, these closets are designed to store clothing, shoes, and other personal items in an organized manner.
Standard Dimensions of Reach-In Closets
The typical dimensions for a reach-in closet are approximately 6 feet in length, 8 feet in height, and 24 inches in depth. This depth is sufficient to hang clothes without them touching the back wall. Widths can vary, usually ranging from 3 to 8 feet, depending on the available space in the room.
Designing Your Reach-In Closet
Effective design is crucial to maximize the functionality of a reach-in closet. Incorporating a combination of hanging rods, shelves, and drawers can help accommodate various items. Adjustable components offer flexibility, allowing the space to evolve with changing storage needs. Utilizing the full height of the closet by installing shelves up to the ceiling can provide additional storage for less frequently used items.
DIY Customization Tips
Customizing your reach-in closet can be a rewarding DIY project. Start by assessing your storage needs and planning a layout that includes a mix of hanging space, shelving, and drawers. Utilizing simple tools, you can install modular systems or build custom shelves to fit your specific requirements. Incorporating elements like built-in dressers or shoe racks can further enhance organization and accessibility.
Innovative Storage Solutions
To optimize storage in a reach-in closet, consider implementing the following solutions:
- Double Hanging Rods: Install two rods, one above the other, to double the hanging space for shorter garments like shirts and pants.
- Pull-Down Closet Rods: These rods allow you to utilize higher spaces in the closet, making it easier to access items stored at greater heights.
- Tension Rods: Versatile and easy to install, tension rods can be used to create additional hanging space for accessories or to divide sections within the closet.
Lighting Considerations
Proper lighting enhances the functionality and appearance of a reach-in closet. Options include:
- Motion-Activated Lights: These provide illumination upon detecting movement, offering convenience and energy efficiency.
- LED Strip Lights: Installed along shelves or rods, they offer even lighting and a modern aesthetic.
- Recessed Lighting: Placed just inside the closet opening and angled towards the back, recessed lights minimize shadows and provide ample illumination.
Organizational Accessories
Incorporating accessories can significantly improve closet organization:
- Velvet Hangers: These slim, non-slip hangers save space and keep clothes in place, preventing them from slipping off.
- Drawer Dividers: Useful for organizing smaller items like accessories or undergarments within drawers.
- Shoe Racks: Keep footwear organized and easily accessible, preventing clutter on the closet floor.
Common Mistakes to Avoid
When organizing a reach-in closet, be mindful of these pitfalls:
- Overcrowding: Avoid cramming too many items, as it can lead to wrinkles and make it difficult to find what you need.
- Neglecting Vertical Space: Failing to utilize the full height of the closet misses out on potential storage opportunities.
- Lack of Regular Maintenance: Without periodic decluttering and reorganization, the closet can quickly become disorganized.
Conclusion
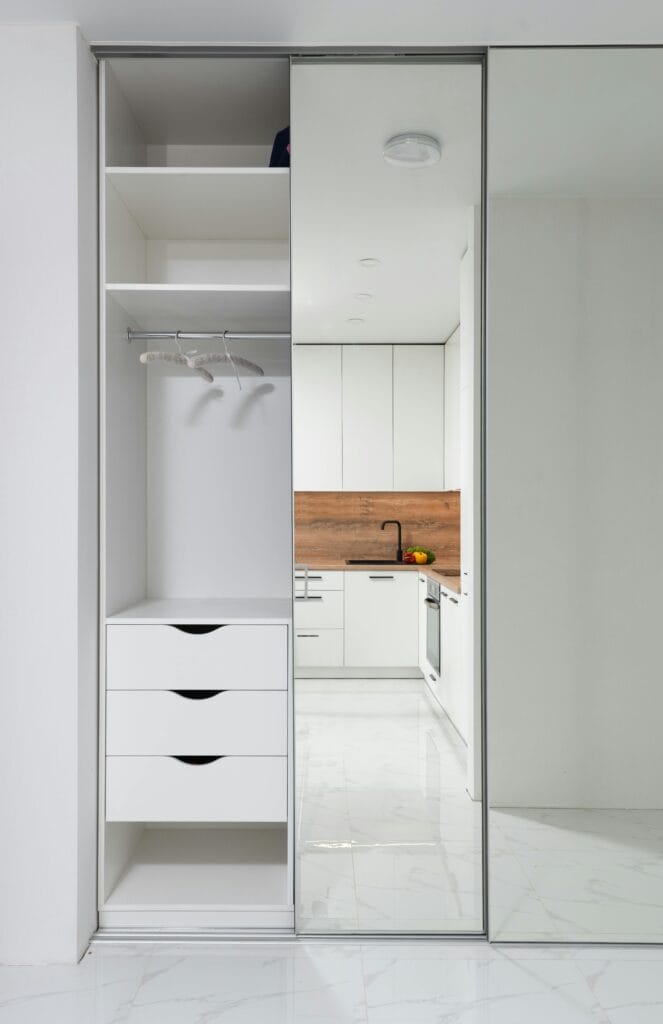
A well-designed reach-in closet can significantly enhance the organization and functionality of your living space. By understanding standard dimensions, implementing thoughtful design, and incorporating innovative storage solutions and proper lighting, you can transform a simple closet into an efficient and aesthetically pleasing storage area. Regular maintenance and mindful organization will ensure that your reach-in closet remains a valuable asset in your home.
FAQs
- How can I add more storage to a small reach-in closet?
Utilize vertical space by installing shelves up to the ceiling, use double hanging rods to increase hanging capacity, and incorporate door-mounted organizers for accessories. - What type of lighting is best for reach-in closets?
LED strip lights and motion-activated lights are popular choices, providing bright, energy-efficient illumination without taking up much space. - Are there budget-friendly ways to organize a reach-in closet?
Yes, using items like tension rods, over-the-door organizers, and stackable bins can enhance organization without significant expense. - How do I maintain an organized reach-in closet?
Regularly declutter items you no longer use, assign specific spots for each category of clothing, and make it a habit to return items to their designated places. - Can I install a reach-in closet system myself?
- Many modular closet systems are designed for DIY installation, offering customizable components that can be adjusted to fit your space and storage needs.
This post contains affiliate links. If you purchase through these links, we may earn a small commission at no extra cost to you. Thank you for supporting Closet DIY!
The closet door is the part of a closet project everyone underestimates. You spend weeks planning shelving, rods, and drawers — then grab whatever door looks fine at the store without realizing it will affect how much of your closet you can actually reach, how much floor space you lose, and how much the whole project costs.
There are six main types of closet doors, and each one is genuinely the right choice for a different situation. This guide breaks down exactly how each type works, what it costs, and which one fits your space — so you can choose with confidence instead of guessing.
Closet Door Types at a Glance
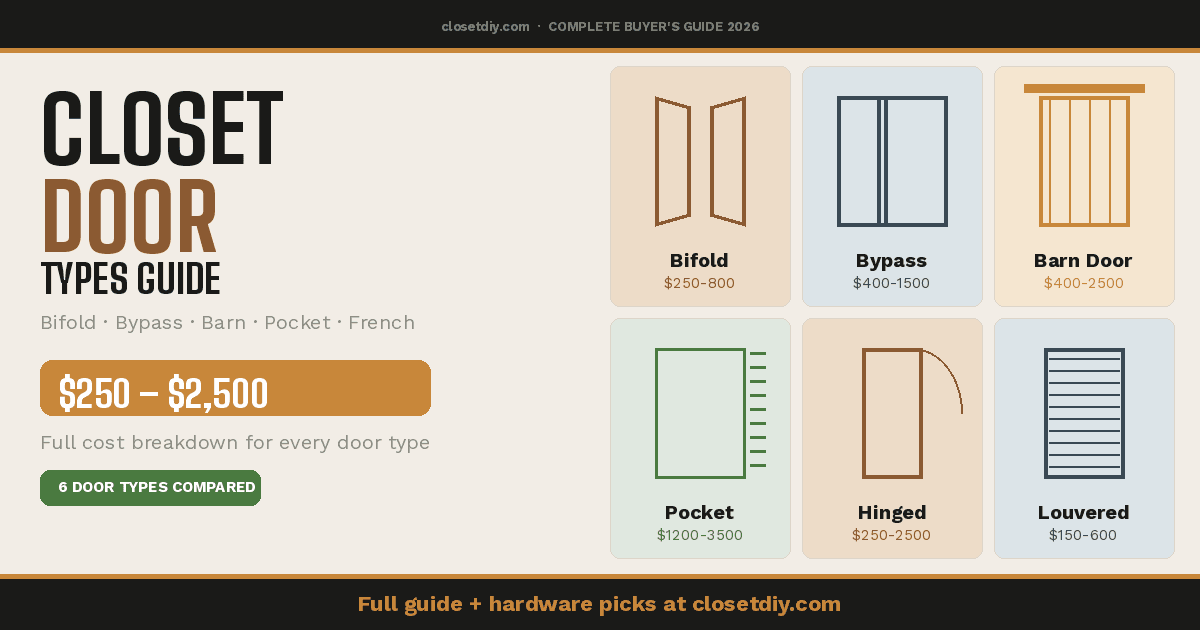
| Door Type | Best For | Full Access? | Cost (Installed) |
|---|---|---|---|
| Bifold | Standard reach-in closets | Yes | $250 – $800 |
| Bypass (sliding) | Wide closets, tight rooms | Half at a time | $400 – $1,500 |
| Barn door | Statement / design focal point | Yes | $400 – $2,500 |
| Pocket door | Zero visible footprint | Yes | $1,200 – $3,500 |
| Hinged / French | Walk-in closets, wide openings | Yes | $250 – $2,500+ |
| Louvered | Closets needing airflow | Yes | $150 – $600 |
1. Bifold Doors — The Standard Choice
Bifold doors are the most common closet door style in North American homes, and for good reason. Two panels are hinged together in the middle so they fold like an accordion and tuck to the side of the frame when opened, giving you full access to the closet opening while taking up minimal swing space.
Pros
- Full access to the entire closet opening when open
- Most affordable option — $250 to $800 installed for a standard pair
- Widely available in standard sizes at any home improvement store
- Simple DIY installation if replacing an existing bifold with the same size
Cons
- Prone to popping off the bottom pivot track if not installed correctly or if the track wears out
- Leaves a visible center gap between panels where dust can enter
- Folding panels can feel less premium than other styles
Best For
Standard reach-in closets, kids’ rooms, guest rooms, and any budget-conscious closet upgrade. If you’re replacing worn-out bifold doors with the same size, this is one of the easiest weekend swaps in home improvement.
🛒 Shop bifold doors and hardware: Bifold Closet Door (Standard White, 2-Panel) | Bifold Door Track & Pivot Hardware Kit | Replacement Bottom Pivot Kit
2. Bypass (Sliding) Doors — Best for Tight Rooms
Bypass doors — sometimes just called sliding closet doors — use two or more panels that hang from an overhead track and slide behind one another. Unlike bifold doors, they require zero floor clearance to operate, which makes them ideal for rooms where furniture or walking space is tight right in front of the closet.
Pros
- No floor clearance needed to open — perfect for small bedrooms
- No swing radius to plan around
- Available in mirrored finishes, which double as a full-length mirror
- Clean, simple look that works with most interior styles
Cons
- Only gives access to one side of the closet at a time
- Panels can be heavy, especially mirrored versions, and require sturdy track hardware
- Track can accumulate dust and debris over time, causing sticking
Best For
Small bedrooms, hallway closets, and anywhere floor space in front of the closet is at a premium. Mirrored bypass doors are also a popular way to add a full-length mirror without using any wall space.
🛒 Shop bypass door hardware: Bypass Sliding Door Track Kit | Mirrored Bypass Closet Door
3. Barn Doors — The Design Statement
Barn doors have surged in popularity over the past several years as a design-forward alternative to traditional closet doors. A barn door mounts on an exposed track above the door opening and slides along the wall surface rather than folding or sliding within the frame.
Pros
- Strong visual impact — often becomes a focal point of the room
- No floor track to maintain or clean
- Wide range of styles: rustic wood, modern glass, black metal frames
- Works well when there’s no wall cavity available for a pocket door
Cons
- Requires wall space equal to the door width on one side of the opening
- Leaves a visible gap of about a half-inch to an inch between door and wall, reducing privacy and sound blocking
- Track must be anchored into a structural header or solid blocking between studs — a single door panel can weigh 60 to 120 lbs
- More expensive than bifold or bypass in most cases
Cost Breakdown
- Single barn door: $400 – $1,400 installed
- Double barn doors: $800 – $2,800 installed
- Bypass-style barn doors (2+ panels on parallel tracks): $500 – $1,500 installed
💡 Pro Tip: Standard hardware kits include a steel track rated for 150 to 300 lbs, roller hangers, floor guides, and mounting brackets. Always confirm your track is rated well above your door’s actual weight — this isn’t a place to cut corners.
🛒 Shop barn door hardware: Sliding Barn Door Hardware Kit (Heavy Duty) | Barn Door Soft-Close Kit | Barn Door Floor Guide
4. Pocket Doors — The Invisible Option
A pocket door slides directly into a hollow cavity built into the wall, disappearing completely when open. When closed, it looks and functions like a normal swinging door, but takes up zero floor space and requires no swing radius at all.
Pros
- Completely invisible when open — the cleanest possible look
- Zero floor space required, unlike every other door type
- Ideal where furniture placement or walking paths can’t accommodate any door swing or slide-by clearance
Cons
- By far the most expensive and invasive option to install in an existing wall
- Retrofitting into an existing wall requires removing drywall, modifying structural framing, and sometimes rerouting electrical wiring
- Not a realistic weekend DIY project unless the wall cavity is already prepped
Cost Breakdown
New pocket door installation in an existing wall typically runs $1,200 to $3,500 depending on hardware quality and whether the wall needs structural modification. This is almost always a job best suited to a professional unless you’re already doing a larger renovation with the wall open.
Best For
New construction or major renovations where the wall is already open, tight spaces where literally no door swing can be accommodated, and homeowners prioritizing a seamless, doorless look when the closet is open.
5. Hinged and French Doors — The Traditional Choice
Hinged closet doors operate like a standard interior door, attached to the frame with hinges and swinging open into the room. French doors are a variation where two hinged doors meet at the center and swing outward, often used for wider walk-in closet openings.
Pros
- Solid, quiet operation with no tracks or rollers to maintain
- Full access to the closet opening
- Available in the widest range of materials — solid wood, glass inserts, panel styles
- Best sound and light blocking of any door type when properly weatherstripped
Cons
- Requires a swing radius in the room — not ideal for tight bedrooms
- Can conflict with furniture placement if not planned carefully
- Heavier and more expensive than bifold or bypass for the same opening width
Best For
Walk-in closets where the door swing doesn’t conflict with furniture or foot traffic, and anywhere you want a more premium, traditional look. This is also the best choice if you want the option to add glass panel inserts for a boutique-style closet reveal.
🛒 Shop hinged door hardware: Interior Door Hinges (Heavy Duty, 3-Pack) | French Door Handle Set
6. Louvered Doors — Built for Airflow
Louvered doors feature horizontal slats that allow air to pass through while still providing visual coverage. This makes them the clear choice for any closet housing equipment that generates heat or needs ventilation.
When You Need Louvered Doors
If the closet houses a water heater, HVAC air handler, or washer/dryer, louvered bifold doors allow airflow that prevents moisture buildup and provides necessary combustion air. Solid panel doors in these locations can trap humidity and heat — a real problem for both equipment lifespan and mold prevention.
Pros
- Only door type that provides meaningful ventilation
- Available in bifold or hinged configurations
- Prevents moisture and heat buildup in equipment closets
Cons
- Provides zero sound blocking or privacy
- Not suitable for clothing closets where you want a finished, clean look
- Slats can collect dust and require more frequent cleaning
Best For
Utility closets, laundry closets, water heater closets, and any space with equipment that needs to breathe. Never use solid panel doors on a closet housing a gas water heater or furnace — check your local code, as ventilation is often a safety requirement, not just a preference.
Standard Closet Door Sizes
Closet door sizes are based on the finished opening — after drywall and trim — not the rough framing opening. Getting this measurement right before you shop saves a return trip to the store.
- Single bifold: 24 in wide openings
- Double bifold: 48 in wide openings
- Bypass doors: 60 in or 72 in wide openings
- Standard height: almost always 80 inches
If your opening is non-standard, some bifold doors can be trimmed up to 1 inch on each side. For anything more unusual, you’ll need a custom order — expect custom doors to cost 2 to 4 times more than a stock size.
Full Cost Comparison Table
| Door Type | Door Only | Installed (Total) |
|---|---|---|
| Standard hollow-core panel | $50 – $200 | $250 – $750 |
| Bifold (basic) | $80 – $300 | $250 – $800 |
| Bypass / sliding | $150 – $600 | $400 – $1,500 |
| Barn door (single) | $200 – $900 | $400 – $1,400 |
| Barn door (double) | $400 – $1,600 | $800 – $2,800 |
| Pocket door | N/A (wall install) | $1,200 – $3,500 |
| Louvered | $100 – $400 | $150 – $600 |
| Custom / glass | $1,000 – $3,300 | $1,200 – $5,800 |
Which Closet Door Should You Choose?
Use this quick decision guide based on your specific situation:
- Tightest budget: Standard bifold doors — the cheapest option that still gives full closet access
- Small bedroom, no room for door swing: Bypass sliding doors
- Want a design statement piece: Barn door
- Zero visible footprint, doing a bigger renovation: Pocket door
- Walk-in closet, want a premium traditional look: Hinged or French doors
- Closet with a water heater, furnace, or washer/dryer: Louvered doors — this isn’t optional, it’s often a safety requirement
DIY or Hire a Professional?
If you’re simply swapping old bifold panels for new ones of the exact same size using the existing track, the DIY route is highly accessible — you’ll need just a screwdriver, a tape measure, and a level.
However, if you’re installing a prehung door, retrofitting a slab into an old frame, or setting up a heavy barn door track, the project becomes significantly more complex and may be worth hiring out — especially for barn doors, where the track must be anchored into structural framing to safely support 60 to 120 lbs of hanging door weight.
Pocket doors should almost always be left to a professional unless you’re already working with an open wall as part of a larger renovation.
Plan Your Full Closet Project
Choosing your door is just one piece of the puzzle. Use our free Closet Cost Calculator to estimate your total project budget including shelving, rods, and drawers completely free.
Check out our related guides for more on planning your closet build:
- What Is the Ideal Rough Opening Size for Bypass Doors?
- ClosetMaid vs IKEA PAX — Which Is Better for Your Budget?
- How to Build a Walk-In Closet with IKEA PAX
Frequently Asked Questions
What is the most affordable closet door type?
Standard bifold doors are the most affordable option, typically costing $250 to $800 installed for a standard pair. Basic hollow-core panel doors can be even less expensive, starting around $250 installed.
What closet door is best for a small bedroom?
Bypass sliding doors are usually the best choice for small bedrooms since they require zero floor clearance to open — unlike bifold or hinged doors, which need swing or fold space in the room.
Do barn doors provide privacy?
Not completely. Barn doors typically leave a gap of about a half-inch to one inch between the door and the wall, which reduces both privacy and sound blocking compared to a bifold, hinged, or pocket door.
Can I install a barn door myself?
Yes, if you have basic DIY skills and the right tools — but the track must be anchored into a structural header or solid blocking between wall studs, since a single door panel can weigh 60 to 120 lbs. Skipping this step is a common and serious mistake. If you’re not confident locating solid framing, this is worth hiring out.
Why do bifold doors keep falling off the track?
This usually happens when the bottom pivot — a small plastic or metal guide that rides in a floor-mounted track — wears out or breaks. Replacement pivot kits are inexpensive and take about 15 minutes to install, and are worth trying before replacing the entire door.
What type of door should I use for a closet with a water heater?
Louvered doors, which allow airflow through horizontal slats. Solid panel doors can trap heat and humidity around equipment like water heaters, furnaces, and HVAC air handlers — check your local building code, as ventilation is sometimes a safety requirement rather than just a preference.
This post contains affiliate links. If you purchase through these links, we may earn a small commission at no extra cost to you. This never affects our recommendations — we only link to products we genuinely trust.
This post contains affiliate links. If you purchase through these links, we may earn a small commission at no extra cost to you. Thank you for supporting Closet DIY!
Small closets are one of the most frustrating storage problems in any home. Too little space, too many clothes, and never enough room for shoes, bags, or accessories.
The good news? You probably don’t need a bigger closet. You just need to use the space you have more intelligently.
These 15 small closet organization ideas are practical, affordable, and proven to work — many of them will double your usable storage space without any major renovation. We’ve included specific product recommendations for each idea so you can start implementing today.
Let’s get into it.
Before You Start: The One Rule That Changes Everything
Before adding a single organizer or shelf, professional organizers agree on one thing: declutter first.
Take everything out of your closet. Sort into three piles: keep, donate, and discard. Be ruthless — if you haven’t worn it in 12 months, it probably doesn’t need prime closet real estate. A closet with 30% fewer items that’s well organized will always outperform a packed closet with perfect systems.
Once you’ve decluttered, measure your closet: width, depth, and ceiling height. You’ll need these numbers for several of the ideas below.
Now let’s maximize what you’ve got.
Idea 1: Add a Double Hang Rod — Instantly Double Hanging Space
This is the single highest-impact change you can make to any small closet — and it costs under $30.
Most reach-in closets come with one single hanging rod running the full width of the closet. This wastes enormous amounts of vertical space beneath the rod. A closet rod doubler (also called a rod extender) hangs from your existing rod and adds a second rod below it — instantly doubling your hanging capacity in that section.
Use the double hang section for shirts, jackets, folded trousers, and shorter items. Reserve a single-hang section for dresses, long coats, and suits.
🛒 Recommended: Adjustable Closet Rod Doubler / Extender — fits most standard rods, adjustable height. Under $25 on Amazon.
💡 Pro Tip: The sides of the rod doubler are adjustable up and down — use this to fine-tune the lower rod height based on the length of items you’re hanging below it.
Idea 2: Switch to Slim Velvet Hangers
This sounds too simple to make a difference. It makes a massive difference.
Standard plastic hangers are about 0.75 inches thick. Slim velvet hangers are about 0.2 inches thick — roughly 4 times thinner. Swapping all your hangers can recover 30 to 50% of your hanging rod space instantly, with zero other changes to your closet.
Velvet hangers also grip slippery fabrics (silk, satin, off-shoulder tops) far better than plastic, so clothes stay put instead of sliding off.
🛒 Recommended: Velvet Slim Hangers 50-Pack — over 95,000 five-star Amazon reviews. Available in multiple colors. Under $30.
Idea 3: Use Every Inch of Vertical Space
Most small closets waste the top 18 to 24 inches of space near the ceiling. This zone is perfect for items you don’t access daily — seasonal clothing, extra bedding, luggage, or holiday decorations.
Add a shelf above your existing top shelf using simple shelf brackets and a pre-cut board from your hardware store. Alternatively, use large labeled storage bins on the existing top shelf to keep seasonal items organized and easy to identify.
🛒 Recommended: Heavy-Duty Shelf Brackets (4-pack) | Large Lidded Storage Bins with Labels
💡 Pro Tip: Use a step stool kept just outside the closet door for easy access to top-shelf items. A folding step stool takes up almost no space.
Idea 4: Install an Over-the-Door Organizer
The back of your closet door is prime real estate that most people completely ignore. A well-chosen over-the-door organizer can add significant storage without using any floor or wall space.
Over-the-door options include:
- Shoe organizers — great for shoes, accessories, or small folded items
- Hook racks — perfect for bags, belts, scarves, and hats
- Pocket organizers — ideal for jewelry, sunglasses, and small accessories
- Mirror with storage — combines a full-length mirror with door-mounted pockets
🛒 Recommended: Over-the-Door Shoe Organizer (24 pockets) | Over-the-Door Hook Rack (6 hooks)
Idea 5: Add Under-Shelf Hanging Baskets
Under-shelf baskets clip onto the underside of existing shelves and create instant bonus storage in the space below. They’re perfect for folded t-shirts, socks, underwear, or small accessories that would otherwise sit in a pile.
They require no tools, no drilling, and cost under $15 each. This is one of the easiest wins in any small closet.
🛒 Recommended: Under-Shelf Storage Baskets (set of 4) — fits most standard wire and wood shelves. Tool-free installation.
Idea 6: Use Shelf Dividers for Folded Stacks
If you fold sweaters, jeans, or t-shirts on open shelves, you know the problem: stacks topple over and become a mess within days. Shelf dividers clip onto shelves and act as invisible walls between stacks — keeping everything upright and accessible without turning your shelves into a leaning tower of denim.
🛒 Recommended: Closet Shelf Dividers (6-pack) — adjustable to fit most shelf thicknesses. Available in clear acrylic or metal finishes.
Idea 7: Add a Stackable Shoe Rack
Shoes piled on the closet floor are one of the biggest space-wasters in any small closet. A stackable shoe rack organizes your footwear vertically, can hold 12 to 20 pairs in the footprint of 4 to 6 pairs on the floor, and keeps pairs together and easy to find.
Choose a modular or stackable design so you can add tiers as needed. Adjustable-angle designs work for both flat shoes and heels.
🛒 Recommended: Stackable Shoe Rack (expandable, 4-8 tiers) | Clear Stackable Shoe Boxes (12-pack) — great for protecting dress shoes while keeping them visible.
Idea 8: Store Handbags on a High Shelf with Dividers
Handbags are closet space vampires — they’re bulky, they tip over, and they’re hard to stack. The cleanest solution is a dedicated high shelf with shelf dividers between each bag. This keeps bags upright, visible, and protected from being crushed.
For everyday bags, use a row of S-hooks on the hanging rod or a hook strip on the closet side wall — bags hang neatly and are instantly accessible.
🛒 Recommended: S-Hooks for Closet Rod (10-pack) | Purse Organizer Shelf Inserts
Idea 9: Use Vacuum Storage Bags for Seasonal Items
Bulky winter sweaters, heavy blankets, and seasonal coats take up enormous amounts of closet space for months when you’re not using them. Vacuum storage bags compress these items to about 1/3 of their original size — freeing up that space for everyday items.
Store vacuum-packed seasonal items on the top shelf or under the bed, and rotate them in and out twice a year.
🛒 Recommended: Vacuum Storage Bags with Hand Pump (8-pack) — no vacuum cleaner needed. Holds compression for months.
💡 Pro Tip: Don’t use vacuum bags for down items (jackets, duvets) — compression can permanently damage the fill. Use breathable storage bags for these instead.
Idea 10: Add a Small Dresser or Drawer Tower Inside the Closet
If your closet has floor space on one side (after adding a double hang rod on the other side), a small 3 to 5 drawer dresser or freestanding drawer tower can replace the need for a bedroom dresser entirely — freeing up bedroom floor space and keeping all your clothing in one organized place.
Look for a tower that fits your exact closet depth (most reach-in closets are 24 inches deep). A 5-drawer tower with a 20-inch depth fits perfectly in most standard closets.
🛒 Recommended: 5-Drawer Fabric Dresser Tower — lightweight, easy to assemble, fits standard reach-in closet depth. Under $80.
Idea 11: Use the Side Walls for Hook Storage
The side walls of a reach-in closet are almost always wasted space. A simple row of wall-mounted hooks or a pegboard panel on the side wall creates instant storage for:
- Belts rolled and hung individually
- Scarves and ties
- Hats
- Bags and totes
- Jewelry (necklaces especially — prevents tangling)
🛒 Recommended: Wall-Mounted Hook Rail (6 hooks, with screws) | Pegboard Panel Kit with Hooks
Idea 12: Organize by Category, Not by Person
This is a free organization upgrade — no products needed. Instead of organizing your closet by whose clothes are whose, organize by category:
- All shirts together, sorted by color
- All pants together
- All jackets together
- All dresses together
Category organization makes it far easier to see everything you own at a glance, eliminates duplicate buying (“I didn’t know I already had three grey sweaters”), and makes the closet feel more spacious by reducing visual chaos.
💡 Pro organizer tip: Within each category, arrange by color from light to dark (left to right). This makes finding specific items faster and makes the closet look significantly more organized at a glance.
Idea 13: Use Clear Bins with Labels on High Shelves
Opaque bins on top shelves are a memory test — you have to pull them all down to find what you’re looking for. Clear bins with labels solve this instantly. You can see exactly what’s inside without touching anything, and a label confirms the contents at a glance.
Use consistent bin sizes for a clean, uniform look. Label with a label maker or simple adhesive labels.
🛒 Recommended: Clear Stackable Bins with Lids (6-pack) | Label Maker (handheld)
Idea 14: Install a Tension Rod for Accessories
A simple tension rod — the kind used for shower curtains — installed vertically or horizontally in an unused section of your closet creates instant hanging storage for:
- Scarves draped over the rod
- Belts hung by their buckles on S-hooks
- Clutch purses hung by handles
- Tank tops on mini hangers
Tension rods require no drilling, cost under $10, and can be repositioned or removed at any time — making them perfect for renters.
🛒 Recommended: Tension Rod Set (adjustable, 2-pack) — holds up to 20 lbs. No drilling required.
Idea 15: Add Lighting — It Makes Everything Feel Bigger
This is the most underrated small closet upgrade. A dark closet always feels smaller and more chaotic than it really is — you can’t find things, so you dig, and digging creates mess. Good lighting solves this.
You don’t need hardwired electrical work. Battery-operated LED lights with motion sensors are bright, easy to install, and last months on a single set of batteries. Stick them under shelves or on the ceiling of the closet for instant, automatic lighting every time you open the door.
🛒 Recommended: Motion-Activated LED Closet Light (2-pack) | LED Under-Shelf Strip Light (adhesive)
Quick Wins Summary — What to Do This Weekend
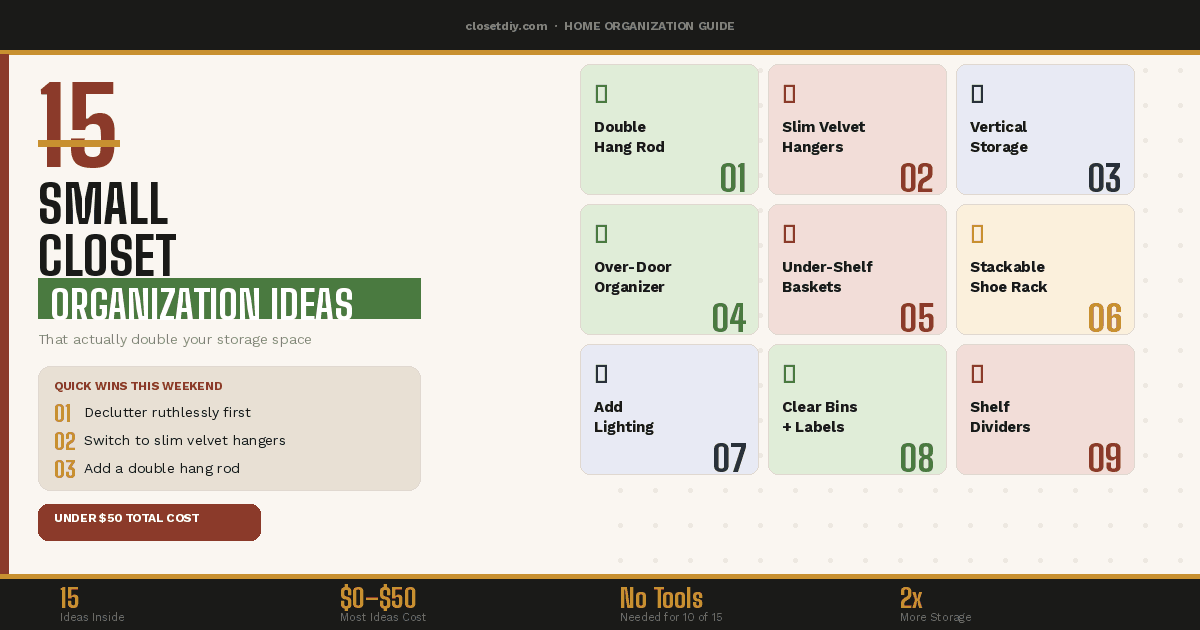
If you want to make the biggest impact in the least time, do these three things this weekend:
- Declutter — spend 2 hours pulling everything out and donating what you don’t wear
- Swap your hangers — switch to slim velvet hangers for instant extra rod space
- Add a rod doubler — double your hanging capacity in the short-hang section
These three steps alone — costing under $50 total — will transform most small closets dramatically.
Want to Go Further?
If you’re ready to do a full closet system upgrade, check out our related guides:
- ClosetMaid vs IKEA PAX — Which Is Better for Your Budget?
- Best Closet Organizers Under $200
- Free Closet Cost Calculator — estimate your project budget in under a minute
Frequently Asked Questions
How do I organize a small closet with lots of clothes?
Start by decluttering — remove anything you haven’t worn in 12 months. Then add a double hang rod to maximize hanging space, switch to slim velvet hangers to recover rod space, and use vertical space with an extra shelf near the ceiling for seasonal storage. These three steps alone significantly increase usable capacity.
What is the best way to organize a reach-in closet?
Dedicate one section to double-hang clothing (shirts, jackets, short items), one section to single-hang clothing (dresses, long coats), and one section to a drawer tower or shelving for folded items. Use the back of the door for accessories and shoes, and the top shelf for seasonal storage in labeled bins.
How do I make my small closet look bigger?
Paint the interior a bright white or soft neutral before organizing. Add lighting — a well-lit closet always looks and feels larger. Use matching hangers and storage bins for a uniform, intentional look. Clear out the floor completely — a clear closet floor is one of the biggest visual space-makers.
What should I store on the top shelf of my closet?
The top shelf is best for items you don’t access daily — seasonal clothing in vacuum bags, spare bedding, luggage, or holiday decorations. Use large clear bins with labels so you can identify contents without pulling everything down.
Can I organize a small closet without spending a lot of money?
Absolutely. The highest-impact changes — decluttering, switching to slim hangers, adding a rod doubler, and reorganizing by category — cost between $0 and $50 total. Our free Closet Cost Calculator can help you budget if you decide to go further with a full system upgrade.
This post contains affiliate links. If you purchase through these links, we may earn a small commission at no extra cost to you. This never affects our recommendations — we only link to products we genuinely trust and believe will help our readers.
This post contains affiliate links. If you purchase through these links, we may earn a small commission at no extra cost to you. Thank you for supporting Closet DIY!
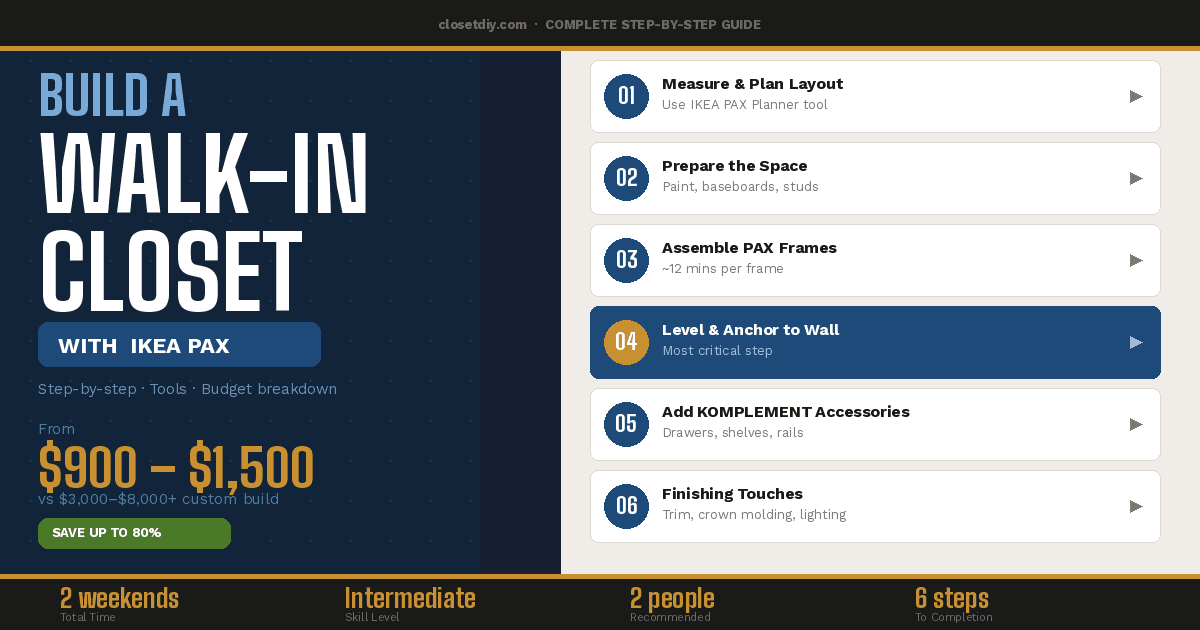
A custom walk-in closet used to mean spending $3,000 to $10,000 with a closet company. Today, with IKEA PAX, you can build something that looks just as good — sometimes better — for $600 to $1,500 in materials and a couple of weekends of your time.
We’ve pulled together everything you need to know to plan, buy, build, and finish a walk-in closet using IKEA PAX — including the real-world tips that experienced builders wish they’d known before starting. No fluff, no filler. Just a complete, honest guide.
Let’s get into it.
What You’ll Need Before You Start
Tools Required
- Stud finder — essential for safe wall mounting
- Self-leveling laser level — the single most important tool for a straight result
- Electric drill + screwdriver bits
- Rubber mallet — for fitting PAX components without damage
- Tape measure — measure twice, buy once
- Pencil — for marking stud locations and frame positions
- Oscillating multi-tool (optional but very helpful for trimming baseboards)
- Clamps — for holding frames together during assembly
🛒 Get the tools: Self-Leveling Laser Level | Stud Finder | Electric Drill Set | Rubber Mallet | Oscillating Multi-Tool
Time Required
- Planning + shopping: 2 to 4 hours
- Assembly + installation: 1 full day (6 to 10 hours with two people)
- Finishing touches (trim, paint): 1 additional weekend if desired
Skill Level
Intermediate DIY. You don’t need carpentry experience, but you should be comfortable using a drill, reading a level, and following flat-pack assembly instructions carefully.
Step 1: Plan Your Layout Using the IKEA PAX Planner
Before you buy a single thing, spend time planning your layout. This is the step most people rush — and the step that causes the most expensive mistakes.
Measure Your Closet Carefully
Measure your closet width, depth, and ceiling height at multiple points. Closets are rarely perfectly square — measure at the floor, middle, and ceiling level and note the smallest dimension. This is the space you have to work with.
Also note the location of:
- Light fixtures and switches
- Electrical outlets
- Air vents (floor or wall)
- Doors that swing into the closet
Use the Free IKEA PAX Planner
Go to IKEA’s website and use their free online PAX Planner tool. It lets you arrange PAX frames in different configurations and see exactly how they’ll fit in your space. Most experienced builders try 3 to 5 different layout configurations before settling on their final plan.
PAX frame sizes available:
- Width: 19.75 in, 29.5 in, or 39.375 in
- Depth: 13.75 in (shallow) or 22.875 in (standard)
- Height: 79.125 in or 92.875 in
💡 Pro Tip: For walk-in closets narrower than 8 feet, use the 13.75 in depth units on the main focal wall to preserve walkway space. The standard 22.875 in depth units work well on side walls where you have more room.
Layout Options for Walk-In Closets
- U-shape: Units on three walls. Maximizes storage but needs at least 6 ft of walkway width to feel comfortable.
- L-shape: Units on two adjacent walls. Great for smaller walk-ins and closets with a door on one wall.
- Single wall: All units on one wall. Best for narrow walk-in closets.
- T-shape: Units on back wall plus partial side walls. Avoids dead corner space while maximizing storage.
💡 Pro Tip from real builders: A U-shaped layout sounds ideal but often creates awkward dead corners. Many experienced builders prefer an L-shape or T-shape that keeps the center walkway open and accessible.
Step 2: Make Your Shopping List
Once your layout is finalized in the PAX Planner, it generates an exact shopping list. Print this out or save it before going to IKEA. Here’s what you’ll be choosing:
PAX Frames
These are the main structural boxes. Choose your width and height based on your layout plan. The taller 92.875 in frames work beautifully with standard 8 ft ceilings — you add a header board above to fill the gap and create a true built-in look.
KOMPLEMENT Interior Accessories
This is where the magic happens. IKEA’s KOMPLEMENT line fits inside all standard PAX frames and includes:
- Drawers (various widths)
- Pull-out trouser hangers
- Shoe shelves and racks
- Adjustable shelves
- Pull-out trays with dividers
- Glass shelves (for a premium look)
- Clothes rails (hanging rods)
Doors (Optional)
PAX frames inside a walk-in closet don’t require doors — you can leave them open. But adding doors (sliding or hinged) gives a cleaner look and hides contents when the closet is open to the bedroom. IKEA offers a wide range of door styles including mirrored, frosted glass, and solid wood-effect finishes.
🛒 Popular KOMPLEMENT accessories on Amazon: KOMPLEMENT Pull-Out Tray with Divider | KOMPLEMENT Soft Closing Drawer
How Much Will It Cost?
Use our free Closet Cost Calculator to get a personalized estimate. As a rough guide:
- Small walk-in (6 x 6 ft): $600 – $900 in PAX materials
- Medium walk-in (8 x 8 ft): $900 – $1,400 in PAX materials
- Large walk-in (10 x 10 ft+): $1,400 – $2,500+ in PAX materials
Step 3: Prepare Your Closet
Before any PAX frames go up, prepare the space properly. Skipping this step is the most common reason PAX installations look amateur rather than custom.
Remove Existing Shelving and Rods
Clear everything out. Remove any existing wire shelving, single rods, or shoe racks. Patch any wall holes with spackling compound and sand smooth once dry.
Paint the Interior First
Paint the closet walls and ceiling before installing any frames. It’s nearly impossible to paint neatly around installed PAX units. Choose a bright white or soft neutral — it makes the space feel larger and the PAX frames look more intentional.
🛒 Recommended: Spackling Compound for Wall Repair | Interior White Paint
Deal with Baseboards
PAX frames sit flush to the wall — but baseboards prevent them from sitting flat against the wall. You have two options:
- Remove the baseboard where frames will be placed (cleaner result, recommended)
- Cut notches in the back of each frame to sit over the baseboard (faster but more complex)
Most experienced builders remove the baseboard sections using an oscillating multi-tool for clean, precise cuts.
Locate and Mark Your Wall Studs
Use a stud finder to locate every stud in the closet walls and mark their positions with painter’s tape. You’ll need this for safely anchoring the PAX frames. Standard stud spacing is 16 inches apart, but always verify — older homes can vary.
Step 4: Assemble the PAX Frames
This is where the actual build begins. The good news: IKEA’s newer PAX 2.0 frames are significantly faster to assemble than older versions.
The New PAX 2.0 Assembly
The updated PAX frames unfold like an accordion — the sides and back panel come pre-connected. This eliminates the tedious step of nailing the backing board that the old PAX required. A single frame now takes about 10 to 15 minutes to assemble.
💡 Pro Tip: Assemble frames in the room where they’ll be installed when possible. Fully assembled PAX frames are large and awkward to carry through doorways.
Assembly Order
- Lay the frame flat on the floor
- Unfold the accordion-style sides
- Insert and tighten all the provided bolts using the IKEA Allen key
- Check that the frame is square before standing it up
- Stand the frame upright — this requires two people for tall frames
Important: Take your time with the first frame. Once you understand the process, each subsequent frame goes much faster.
Step 5: Position and Level the Frames
This is the most critical step in the entire installation. Getting the first frame perfectly level and plumb determines how every other frame lines up.
Place the First Frame
- Position the first frame in its planned location
- Use your laser level to check that it’s perfectly vertical (plumb) on all sides
- Use shims at the base if the floor is uneven — closet floors rarely are perfectly level
- Once level and plumb, mark the wall through the frame’s wall-mounting holes
🛒 Essential: Composite Floor Shims — these don’t compress or rot like wood shims over time.
Secure Frames Together
Before anchoring to the wall, connect adjacent frames to each other using the provided screws and clamps. This keeps everything aligned and prevents shifting over time.
- Clamp two frames together so their front edges are perfectly flush
- Pre-drill to avoid splitting the MDF
- Drive the provided wood screws through the side panels to join the frames
- Check alignment with your laser level after each connection
Anchor to the Wall
This step is non-negotiable for safety — especially for tall frames loaded with clothing and accessories.
- Locate the wall-mounting bracket at the top back of each PAX frame
- Drive screws into wall studs wherever possible
- Where studs aren’t available, use heavy-duty drywall anchors rated for at least 50 lbs each
💡 Pro Tip: At minimum, anchor every other frame into a stud. Don’t rely entirely on drywall anchors for a fully loaded walk-in closet.
Step 6: Install KOMPLEMENT Interior Accessories
With frames in place and secured, now comes the fun part — filling them with storage accessories.
Install Adjustable Shelves
Adjustable shelves simply peg into the rows of holes on the interior sides of each PAX frame. No tools needed — just choose your height and press in the pegs. Space shelves based on what you’re storing:
- Folded sweaters and jeans: 12 to 14 in spacing
- Shoes (upright): 6 to 8 in spacing
- Folded t-shirts: 10 to 12 in spacing
- Handbags: 10 to 16 in spacing depending on bag size
Install Clothes Rails (Hanging Rods)
KOMPLEMENT clothes rails are adjustable in length and attach to the inner side walls of PAX frames. For a walk-in closet, you’ll typically set up:
- Double hang sections: Two rods stacked — upper for shirts and jackets, lower for folded trousers or short items. Maximizes space.
- Single long hang: One full-height rod for dresses, long coats, and suits.
Install Drawers
KOMPLEMENT drawers slide into the frame on pre-installed rails. The soft-close drawer glide upgrade is worth the extra cost — it prevents drawers from slamming and extends the life of the hardware significantly.
💡 Pro Tip: If your closet is in a humid area (like a basement), consider upgrading to Blum Tandembox drawer glides. Standard PAX particleboard drawer boxes can swell in high humidity.
Step 7: Finishing Touches — Making It Look Custom
This is where a basic IKEA PAX installation becomes something that looks like a $5,000 custom closet. These finishing touches take a weekend but make an enormous visual difference.
Fill the Holes in the Frames
PAX frames have hundreds of pre-drilled holes on the inside for shelf pegs. Any holes you’re not using will be visible from the front. Buy IKEA cover caps (or generic equivalent) to fill unused holes for a clean, polished look.
💡 Tip from real builders: Buy more cover caps than you think you need — at least 300 to 400 for a full walk-in. Running out mid-project is frustrating.
Add a Header Board (Crown Molding Area)
If your PAX frames don’t reach the ceiling (and they almost never do perfectly), add a horizontal header board above the frames to fill the gap. This single step is the biggest visual upgrade — it instantly transforms “IKEA furniture” into “built-in cabinetry.”
Use 1×4 or 1×6 poplar boards, paint to match the frames, and nail into the wall above the frames. Then add crown molding at the top edge for a truly custom finish.
🛒 Recommended: Crown Molding (flexible, paintable) | Construction Adhesive | Finish Nailer
Add Side Panels and Face Frames
If the side of your PAX installation is visible (for example, the end unit faces into the room), cover it with a matching painted board or add a face frame made from 1×2 lumber. This hides the raw MDF edge and gives a furniture-quality finish.
Add Baseboard Trim at the Bottom
Run new baseboard molding across the base of the PAX installation to match the rest of the room. Paint to match the frames and wall. This ties the entire installation into the room and removes any visible gap at the floor line.
Install Closet Lighting
Lighting transforms the usability and feel of a walk-in closet more than almost any other upgrade. Options include:
- Battery LED strip lights: Easiest — stick under shelves with no wiring. Motion-activated options available.
- Plug-in puck lights: Brighter than strips, easy to install inside each frame section.
- Hardwired overhead lighting: Best result but requires an electrician if there’s no existing light.
🛒 Recommended lighting: Motion-Activated LED Closet Light Strip | Rechargeable Puck Lights (4-pack)
Common Mistakes to Avoid
These are the most common errors real builders have reported — learn from them before you start:
- ❌ Skipping the laser level. A frame that’s even slightly off-plumb will cause doors to hang crooked and drawers to slide unevenly. Always level perfectly.
- ❌ Not removing baseboards first. Frames that sit on top of baseboards look unfinished and can be unstable. Remove or notch them.
- ❌ Buying the wrong frame depth. The 22.875 in deep frames are standard, but in narrow walk-ins they eat up valuable walkway space. Measure your usable aisle width before choosing depth.
- ❌ Not painting before installation. Painting after frames are in place is extremely difficult. Always paint first.
- ❌ Not buying enough cover caps. Every unused peg hole needs a cap for a polished result. Buy 300 to 400 minimum.
- ❌ Assembling tall frames lying down in a different room. A 92.875 in frame is very difficult to carry through a doorway fully assembled. Assemble in the closet where possible.
- ❌ Rushing the first frame. The first frame sets the alignment for everything else. Take your time — the rest will go much faster.
PAX Walk-In Closet Cost Breakdown
Here’s a realistic cost breakdown for a medium-sized walk-in closet (8 x 7 ft) using IKEA PAX:
| Item | Estimated Cost |
|---|---|
| PAX frames (6 units, mixed sizes) | $500 – $700 |
| KOMPLEMENT drawers (6 drawers) | $150 – $250 |
| KOMPLEMENT shelves and rails | $80 – $150 |
| Cover caps (400 pack) | $15 – $25 |
| Trim lumber (header + side panels) | $60 – $120 |
| Crown molding | $30 – $60 |
| Paint and supplies | $40 – $80 |
| LED lighting | $30 – $80 |
| Total Estimated Range | $905 – $1,465 |
For a personalized estimate based on your specific closet dimensions, use our free Closet Cost Calculator.
Frequently Asked Questions
Can I build an IKEA PAX walk-in closet by myself?
Technically yes, but it’s much easier and safer with two people — especially when standing up the tall 92.875 in frames. If you must work alone, assemble frames in place rather than standing them up from the floor. Budget extra time and be especially careful when anchoring to the wall alone.
Do PAX frames need to be anchored to the wall?
Yes — absolutely. Fully loaded PAX frames are heavy and can tip if not secured. IKEA includes a wall-mounting bracket with every frame for this purpose. Always anchor into studs wherever possible, with heavy-duty anchors as a backup where studs aren’t available.
What ceiling height do I need for the tall PAX frames?
The tall PAX frame is 92.875 inches tall (just under 7 ft 9 in). Standard 8 ft ceilings leave a gap of about 3 inches above the frame, which you fill with a header board. For ceilings lower than 7 ft 10 in, use the shorter 79.125 in frame instead.
How do I make IKEA PAX look like built-ins?
The three key steps are: (1) add a painted header board above the frames to fill the ceiling gap, (2) add face frame trim around the visible sides and top edges, and (3) add crown molding along the top. These three additions transform PAX from “flat-pack furniture” to “custom built-in cabinetry.”
Can PAX be installed on carpet?
Yes, but use extra shims to level the base on uneven carpet. Be aware that over time, the weight of a loaded PAX installation can compress carpet padding and cause slight settling. Check and re-level the frames 3 to 6 months after installation.
Is IKEA PAX worth it for a walk-in closet?
For most homeowners, yes. A comparable custom-built walk-in closet from a professional company typically costs $3,000 to $8,000+. A well-executed PAX installation can achieve a similar result for $900 to $1,500. The savings are substantial — as long as you’re willing to invest the time and follow the steps carefully.
This post contains affiliate links. If you purchase through these links, we may earn a small commission at no extra cost to you. This never affects our recommendations — we only link to products we genuinely trust.

How Much Does It Cost to Convert a Bedroom into a Walk-In Closet? (2026)

Elfa vs Container Store vs IKEA PAX: Which Closet System Wins?

Closet Door Types: Bifold vs Sliding vs Barn vs Bypass (Complete Guide)

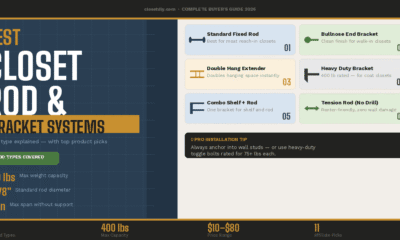
Best Closet Rod & Bracket Systems — Complete Buyer’s Guide (2026)

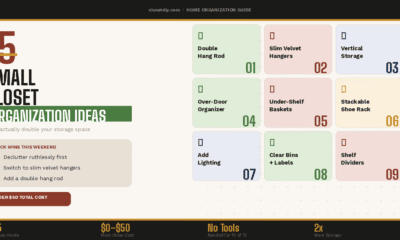
15 Small Closet Organization Ideas That Actually Double Your Storage
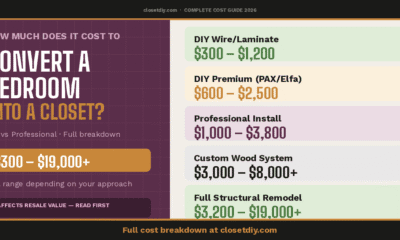
How Much Does It Cost to Convert a Bedroom into a Walk-In Closet? (2026)
This post contains affiliate links. If you purchase through these links, we may earn a small commission at no extra...
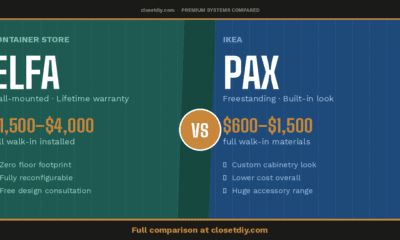
Elfa vs Container Store vs IKEA PAX: Which Closet System Wins?
This post contains affiliate links. If you purchase through these links, we may earn a small commission at no extra...
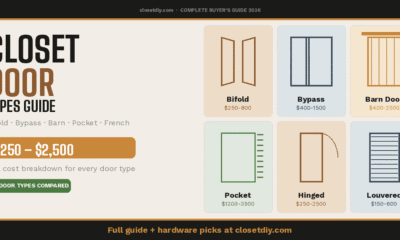
Closet Door Types: Bifold vs Sliding vs Barn vs Bypass (Complete Guide)
This post contains affiliate links. If you purchase through these links, we may earn a small commission at no extra...
Best Closet Rod & Bracket Systems — Complete Buyer’s Guide (2026)
This post contains affiliate links. If you purchase through these links, we may earn a small commission at no extra...
15 Small Closet Organization Ideas That Actually Double Your Storage
This post contains affiliate links. If you purchase through these links, we may earn a small commission at no extra...


How to Build a Walk-In Closet with IKEA PAX — Step by Step Guide
This post contains affiliate links. If you purchase through these links, we may earn a small commission at no extra...


Best Closet Organizers Under $200 That Actually Work (2026 Guide)
This post contains affiliate links. If you purchase through these links, we may earn a small commission at no extra...
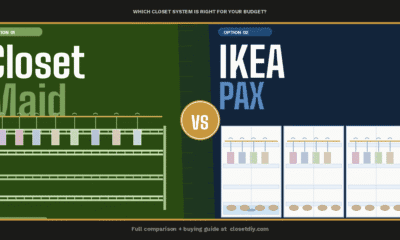

ClosetMaid vs IKEA PAX: Which Closet System Is Better for Your Budget?
This post contains affiliate links. If you purchase through these links, we may earn a small commission at no extra...
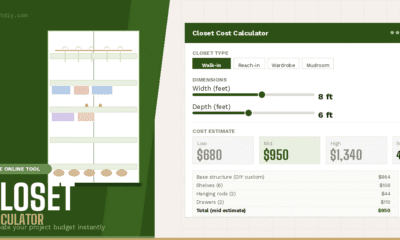

Free Closet Cost Calculator — Estimate Your Project Budget Instantly
This post contains affiliate links. If you purchase through these links, we may earn a small commission at no extra...


Is It Safe to Have a Water Heater in the Attic? Everything Homeowners Need to Know
Having a water heater in the attic is more common than you might think — especially in Southern states where...

 DIY Closet3 years ago
How to troubleshoot and reset the red light on your Aquaguard AG 3000E
 DIY Closet3 years ago
How to Install a Drop-In Sink Without Clips: A Step-by-Step Guide

 Bug Fixing2 years ago
Understanding the Cost of Furnace Collector Box Replacement: What to Expect

 DIY Closet3 years ago
The Best Nails for Luan: A Comprehensive Guide

 DIY Closet3 years ago
Pergola Design: Understanding the Maximum Span for 6×6 Beams

 Bug Fixing3 years ago
Pigtail vs Daisy Chain Outlets: Which is Better for Your Home?
 DIY Closet3 years ago
How to Build a Free Standing 6×6 Post Swing Set: A Step-by-Step Guide

 DIY Closet3 years ago
Understanding the Benefits of a 400 Amp Meter Base with Two 200 Amp Disconnects