DIY Closet
Dehumidifier with Pump vs. No Pump: Which Is Right for Your Home?

When it comes to managing humidity levels in your home, choosing the right dehumidifier is crucial. Dehumidifiers come in various styles, with two primary types: those with a pump and those without. This article explores the differences between the two, helping you make an informed choice for your space and needs.
Understanding Dehumidifiers
Before diving into the differences between dehumidifiers with pumps and those without, it’s essential to understand what a dehumidifier does. A dehumidifier works by extracting moisture from the air, making your home more comfortable and reducing the risk of mold and mildew growth. High humidity levels can lead to various problems, including musty odors, allergies, and structural damage.
The choice between a dehumidifier with a pump and one without can depend on multiple factors, including where you plan to use it, the intensity of humidity in your area, and how frequently you want to empty the water reservoir.
Types of Dehumidifiers
There are generally two main types of dehumidifiers available: those that are equipped with pumps and those that rely on gravity to drain the collected water. Understanding how each type operates will help clarify the pros and cons of each option.
Dehumidifiers with Pumps
A dehumidifier with a pump features an integrated pump that automatically expels water from the unit. This fully automatic feature means you won’t need to worry about manually emptying the water tank. When the tank fills to capacity, the pump kicks in, sending water either to a nearby drain or even outside. This capability is particularly useful in basements or crawl spaces where gravity drainage might be insufficient.
These models can usually move water up to several feet, making them suitable for different home layouts. As a result, they are often chosen for spaces that are darker, more humid, and difficult to access. In addition, dehumidifiers with pumps tend to be more efficient in larger areas, as they can handle continuous drainage without interruptions.
Dehumidifiers without Pumps
On the other hand, dehumidifiers without pumps function quite differently. These units collect moisture in a reservoir, which requires periodic manual emptying once it reaches its maximum capacity. While these models are usually simpler and often less expensive, their practicality can diminish in high-humidity areas or larger rooms.
Most dehumidifiers without pumps rely on gravity to drain the excess water. This means they must be placed above a drain or in a spot where you can easily access the water reservoir for emptying. Although these units can be efficient in smaller spaces, they may fall short when it comes to convenience.
Comparing Features
When deciding between dehumidifiers with a pump versus those without, it’s important to look at various features that may influence your choice.
Capacity and Efficiency
The capacity of a dehumidifier indicates how much moisture it can extract from the air in a given period, typically measured in pints per day. While both types can vary widely in capacity, pump models are often available in larger sizes, allowing them to handle higher moisture loads. This makes them ideal for homes in particularly humid areas or larger square footage.
Efficiency is equally important. Dehumidifiers with a pump can work longer and more consistently without interruption, especially in high-humidity conditions. In contrast, if you opt for a unit without a pump, you may need to factor in additional time for manual tank emptying, which can interfere with continuous operation.
Control Features
Many modern dehumidifiers offer a range of control features such as humidity settings, timers, and automatic shut-off options. Both types of dehumidifiers may come with similar features, but you will often find pumps in more advanced models that include smart controls. These controls allow you to monitor humidity levels and adjust the settings accordingly, providing more convenience and efficiency.
Noise Levels
Noise can also be a deciding factor when choosing a dehumidifier. Both models will generate some sound while operating, but pump models might be slightly noisier due to the additional mechanics involved in pumping the water. If noise is a concern, you may want to explore options and read customer reviews to find the quietest models available.
Placement Considerations
Where you plan to place your dehumidifier can strongly influence the decision between a pump unit and a non-pump model.
Dehumidifiers with Pumps
If you need a dehumidifier for a basement or an area where the moisture levels are particularly high, a pump unit is often the better choice. Not only can these units effectively manage moisture levels, but they can also be placed in areas lacking suitable drainage. Whether your space is slightly above ground level or significantly lower, pump models can easily expel moisture without requiring manual intervention.
Another advantage is that pump models often have longer hoses, making it easier to direct the drained water to the desired location, such as a sink or outside, according to your needs.
Dehumidifiers without Pumps
If you have a small room like a bathroom, laundry room, or a child’s bedroom where humidity tends to build up, a non-pump dehumidifier might suffice. These units are generally smaller, portable, and easier to move around. However, you will need to be diligent in monitoring the water tank so that it doesn’t overflow.
In spaces where it’s easier to access the water tank—like a more traditional storage room or utility closet—a non-pump model can work perfectly fine, allowing for quick emptying after use.
Conclusion
Choosing between a dehumidifier with a pump and one without largely depends on your specific needs and the environment in your home. If you contend with high humidity in a larger area or a basement, a unit with a pump will likely save you time, effort, and stress over manual maintenance. On the other hand, for smaller spaces or less humid environments, opting for a model without a pump may be a more economical and straightforward choice.
Ultimately, your decision should be guided by the humidity levels in your environment, your budget, and the convenience offered by each type of unit. By carefully considering these factors, you can create a comfortable, healthy living space that is free from excess moisture.
FAQs
1. How often should I empty the water tank of a dehumidifier without a pump?
It usually depends on how humid your environment is and the capacity of your dehumidifier’s tank. In a highly humid space, you may need to empty it daily or even multiple times a day.
2. Can I use a dehumidifier in a colder environment?
While some dehumidifiers can operate in colder conditions, it’s best to check the manufacturer’s specifications. Most models are designed to work effectively between 41°F and 95°F, but certain features may become less effective outside this range.
3. How do I maintain a dehumidifier?
Regular maintenance includes cleaning or replacing the air filter as needed, cleaning the water reservoir to prevent mold and mildew buildup, and checking the hose connections if you have a pump model.
4. Can I use a dehumidifier and an air conditioner at the same time?
Yes, running both can complement each other. While an air conditioner cools the air, it also removes some humidity. Using a dehumidifier helps maintain consistent humidity levels, especially in more humid climates.
5. Are dehumidifiers with pumps more expensive to operate compared to non-pump models?
Operating costs may vary, but generally, it’s not significantly higher. The efficiency and convenience of a pump model can sometimes save money in the long run, especially if you regularly deal with high humidity levels.
DIY Closet
How Do I Wire a 2 Wire Hard Start Kit Properly?

Wiring a 2 wire hard start kit can help improve the performance and reliability of your air conditioning or refrigeration unit. This article provides a detailed guide to properly wiring a hard start kit, ensuring your system operates efficiently while also extending its lifespan. Let’s dive into the steps and considerations for a successful installation.
Understanding the Hard Start Kit
A hard start kit is an essential device used in HVAC systems to help compressors start more effectively. When the compressor motor struggles to start, it can draw excessive current, potentially damaging the equipment or causing power issues. The hard start kit provides the necessary boost for the motor, reducing the electrical strain during startup.
When choosing a hard start kit, ensure you select a model compatible with your specific compressor. This compatibility will help guarantee that the kit functions efficiently, providing the maximum benefit without overloading the system.
Tools and Materials Needed
Before beginning the installation of the hard start kit, gather all the necessary tools and materials to simplify the process. Here’s a basic list:
- Tools:
- Screwdriver (flathead and Phillips)
- Wire stripper
- Wire connectors
- Multimeter
- Electrical tape
- Materials:
- 2 wire hard start kit
- Additional wire (if necessary)
- Mounting hardware (if applicable)
Having all these tools and materials will ensure that you can complete the installation without interruption, making the process smoother and more efficient.
Safety Precautions
Ensuring safety during installation is crucial. First and foremost, turn off power to the unit at the circuit breaker before you start working on any electrical components. This precaution will help you avoid electric shock and equipment damage.
Additionally, it’s advisable to wear safety glasses and gloves while handling electrical components. If you’re unsure about any part of the installation process, take the time to consult the instruction manual that comes with the hard start kit or seek professional assistance.
Preparing for Installation
Begin by identifying where the hard start kit will be installed. Typically, this device is mounted near the compressor in your HVAC system. Once you’ve located the installation spot, remove the cover of the compressor using your screwdriver.
Next, observe the existing wiring and ensure you have a clear understanding of how everything is connected. Using a multimeter, check the system for any electrical issues. This step will help you identify if there are any underlying problems that could affect the hard start kit’s performance.
Wiring the Hard Start Kit
Now that you’ve prepared for installation, it’s time to wire the hard start kit properly. Follow these detailed steps:
- Identify the Wires:
- Most hard start kits come with color-coded wires that indicate their functions. Typically, there will be three wires: common (C), start (S), and run (R). Refer to the wiring diagram provided with the kit for specific connections.
- Disabling the Power:
- Before starting, ensure the power is off. Double-check the circuit breaker again to confirm.
- Connecting Wires:
- Locate the wires on the compressor. Disconnect the start wire from the compressor terminal and connect it to the corresponding wire from the hard start kit.
- Next, connect the run wire from the compressor to the second terminal of the hard start kit. Make sure these connections are secure to prevent any electrical arcing.
- Final Wire Connection:
- The remaining wire from the hard start kit should be connected back to the compressor’s common terminal. If the kit has a capacitor, ensure it is correctly wired according to the provided diagram.
- Securing Connections:
- Use wire connectors to secure the connections and cover them with electrical tape to prevent moisture and dust ingress.
Installing the Hard Start Kit
Once the wiring is complete, securely mount the hard start kit near the compressor. If the kit requires mounting hardware, follow the manufacturer’s instructions for proper installation.
After mounting, ensure all screws are tightened and that no wires are pinched or exposed. Double-check all connections one last time before proceeding to restore power. Confirm that everything is correctly wired and secured before turning the circuit breaker back on.
Testing the System
With everything wired and mounted correctly, it’s time to test the system. Restore power to the unit by switching the circuit breaker back on. Listen for any unusual sounds as the compressor starts. The kick from the hard start kit will usually be audible, indicating it is functioning correctly.
Additionally, monitor the unit for a short time to ensure it operates efficiently and without excessive noise. If everything operates smoothly, you have successfully installed the hard start kit.
Regular Maintenance and Considerations
Regular maintenance is essential to keep your HVAC system and the newly installed hard start kit in top shape. Schedule annual inspections and cleanings to minimize wear and tear on the system. This effort not only extends the longevity of your equipment but ensures you maintain optimal performance.
If you notice persistent issues after installing the hard start kit, it may signal an underlying problem with the compressor or electrical connections. In such cases, don’t hesitate to enlist professional help for a thorough diagnosis and repair.
Conclusion
Wiring a 2 wire hard start kit is a straightforward process that can significantly enhance the performance of your HVAC system. With careful attention to detail, proper tools, and safety precautions, you can successfully install the kit to ensure your system operates efficiently.
Remember to perform regular maintenance and seek professional assistance for any issues you cannot resolve. With the right care, your hard start kit can help your HVAC unit perform reliably while saving energy and extending its lifespan. Embrace this DIY project with confidence, and enjoy the benefits of your newfound knowledge and skills.
FAQs
1. What is the purpose of a hard start kit?
A hard start kit aids in the efficient startup of an air conditioning or refrigeration compressor. It provides a boost to the motor during startup, reducing the risk of electrical overload.
2. Can I install a hard start kit myself?
Yes, if you are familiar with basic electrical work and safety protocols, you can install a hard start kit yourself. Always prioritize safety and consult the manual if you’re unsure about any step.
3. How do I know if my compressor needs a hard start kit?
Symptoms include the compressor struggling to start, unusual noises, or frequent tripping of the circuit breaker. If these issues occur, a hard start kit might be beneficial.
4. Will a hard start kit save on energy costs?
Yes, by helping your compressor start more efficiently, a hard start kit can reduce energy consumption and potentially lower your energy bills.
5. What should I do if my hard start kit doesn’t improve performance?
If issues persist after installation, check all connections for tightness and proper connections. If problems continue, consider seeking help from a qualified technician for further diagnosis.
DIY Closet
Can You Install LVP Over Laminate Flooring?

If you’re looking to upgrade your flooring while saving time and effort, you may be wondering whether you can install Luxury Vinyl Plank (LVP) over existing laminate flooring. This article will guide you through the essentials, covering the benefits, preparation, installation process, and important considerations to help you make an informed decision.
Understanding Luxury Vinyl Plank (LVP)
Luxury Vinyl Plank (LVP) has gained immense popularity in recent years thanks to its durability, versatility, and aesthetic appeal. LVP mimics the look of hardwood or stone but is more water-resistant and easier to maintain. It’s available in various styles, colors, and textures, making it an attractive option for many homeowners. LVP can also be installed using different methods, including glue-down, click-lock, or loose lay, providing flexibility depending on your project’s requirements.
Benefits of Installing LVP Over Laminate Flooring
Installing LVP over laminate flooring can offer several advantages. First, it can save you significant time and effort since you don’t have to remove the existing laminate. This can be particularly appealing if you’re short on time or don’t want the hassle of a major renovation project.
Moreover, the thickness of LVP can help in leveling out minor imperfections in the existing laminate. This means that if your laminate has some minor wear and tear, LVP can provide a fresh, smooth surface without the need for extensive repairs.
Additionally, choosing LVP can also enhance your home’s value. Since LVP is popular among homebuyers and renters due to its modern appearance and durability, upgrading your floors can be seen as a worthwhile investment in your property.
Preparing the Existing Laminate Floor
Before you begin the installation process, proper preparation of your existing laminate floor is crucial. Ensuring that the surface is clean, dry, and level will prevent issues in the future, such as warping or uneven seams. Begin by thoroughly cleaning the laminate floor with a suitable cleaner to remove any dirt, grime, or residues. Pay close attention to the corners and edges where dust can accumulate.
Next, assess the condition of the laminate flooring. Look for any loose planks, damaged areas, or significant height differences between the planks. If you encounter any loose tongue-and-groove connections, reattach them with adhesive. It’s also essential to repair any significant damage, as this can affect the integrity of the new LVP installation.
If you notice that your laminate flooring has high or low spots, you may need to use a leveling compound to create a more uniform surface. This will help your new LVP lay flat without any lumps or gaps which can lead to wear and tear.
Installation Process of LVP Over Laminate Flooring
Once the preparation is complete, you can proceed with the installation of your LVP over the existing laminate flooring. Ensure you have all the necessary tools and materials, including LVP planks, underlayment (if required), a utility knife, measuring tape, a straight edge, and spacers.
Step 1: Choose Your Installation Method
Depending on the type of LVP you choose, the installation method may vary. Click-lock planks are popular for DIY installation due to their user-friendly design. If you choose a glue-down option, you will need additional adhesive as per the manufacturer’s guidelines.
Step 2: Acclimate the LVP
Before installation, allow the LVP to acclimate to the room temperature and humidity for at least 48 hours. It helps reduce expansion or contraction after installation, which can lead to buckling or gaps.
Step 3: Lay the Underlayment (if needed)
If your LVP requires an underlayment, lay this down over your prepared laminate floor. An underlayment acts as a barrier and provides additional cushioning and sound dampening. Ensure that you follow the manufacturer’s guidelines for underlayment material and installation.
Step 4: Begin Laying the LVP
Start laying your LVP along the longest wall in the room, using spacers to maintain expansion gaps—typically ¼ inch—from the walls. As you work your way across the room, stagger the seams of the planks for a more natural look. Continue this process until the entire area is covered, ensuring that each plank clicks securely or adheres properly, depending on your chosen installation method.
Finishing Touches
After you lay all the LVP planks, remove the spacers and install baseboards or quarter-round moldings to cover the expansion gap around the edges. This adds a polished look and helps protect the edges of the flooring. If you’ve followed the necessary steps, you should now have a beautiful new floor that enhances your home.
Important Considerations
While there are significant benefits to installing LVP over laminate, there are also key considerations worth noting. Firstly, if your laminate flooring is very loose or damaged, it may be more prudent to remove it before installing LVP. This helps ensure your new flooring has a stable foundation.
Moreover, if the existing laminate is very textured, this may lead to uneven surfaces on your new LVP. In this case, additional underlayment can help to smooth out any rough areas, but it’s essential to consider any height differences it might create with adjacent floors.
Keep in mind that installing LVP over laminate flooring may void warranties on either product, so check the manufacturer’s specifications before proceeding. Ensuring that both flooring options are suitable for layering can help you avoid future headaches.
Conclusion
In summary, it is indeed feasible to install Luxury Vinyl Plank flooring over existing laminate flooring, provided you take the necessary precautions and prepare adequately. This method can save you time and effort while delivering a modern, appealing finish to your home. However, it’s important to assess the condition of your current laminate, as well as follow proper installation techniques to ensure a durable and appealing flooring solution. With the right planning and execution, your DIY flooring project can lead to stunning results that enhance your home.
FAQs
1. Can I install LVP over any type of laminate flooring?
While you can install LVP over most laminate floors, ensure that the laminate is in good condition and free of significant damage. Avoid installation over carpets or any flooring materials that move easily.
2. Do I need an underlayment when installing LVP?
An underlayment may or may not be necessary, depending on the type of LVP you purchase. Always refer to the manufacturer’s instructions to determine if an underlayment is required.
3. Will installing LVP over laminate increase the height of my floor?
Yes, installing LVP over laminate will raise the floor height slightly. It’s essential to consider this if you have doors or adjacent flooring that may be affected by the increase in height.
4. How do I maintain LVP flooring after installation?
Regular sweeping or vacuuming will help remove dirt and dust. For deeper cleaning, use a damp mop with a mild cleaning solution recommended for vinyl floors, avoiding harsh chemicals.
5. What should I do if my LVP starts to buckle or warp?
If your LVP begins to buckle, check for moisture, inadequate expansion gaps, or a poorly prepared subfloor. Address these issues and, if needed, consult a flooring professional for advice or repairs.
DIY Closet
What Causes Black Mold on Cinder Blocks?
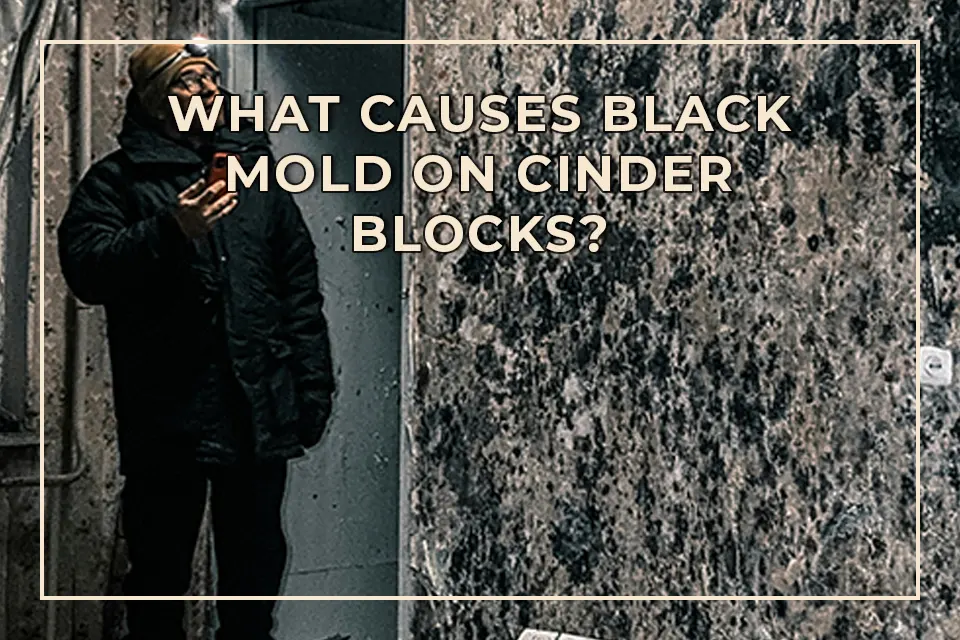
Black mold can be a concerning issue for homeowners, especially when it appears on cinder blocks. This article explores the factors that contribute to the growth of black mold on these concrete materials. Understanding the causes can help in prevention and remediation, ensuring a healthier living environment.
Understanding Cinder Blocks
Cinder blocks, also known as concrete masonry units (CMUs), are lightweight building materials made from a mixture of cement and aggregate, typically ash or slag. These blocks are commonly used in construction for walls, foundations, and other structural purposes. They are durable, fire-resistant, and provide good insulation properties.
While cinder blocks are robust, they can be susceptible to black mold growth under certain environmental conditions. The porous nature of cinder blocks allows moisture to enter, which creates an ideal breeding ground for mold spores. Recognizing the causes of mold growth on these surfaces can help homeowners take proactive measures to prevent this issue.
Excess Moisture as a Primary Cause
The presence of excessive moisture is the primary factor that contributes to black mold growth. Cinder blocks can absorb water like a sponge due to their porous structure. When rainwater leaks into walls, or when humidity levels are high, the moisture within the blocks can remain trapped, leading to mold growth.
In basements, crawl spaces, or areas with poor ventilation, humidity is often higher than in other parts of the home. This environment can become a breeding ground for mold spores, especially if water seeps through cracks or around the foundation. Therefore, maintaining low humidity levels and ensuring proper drainage can help mitigate the chances of mold developing on cinder blocks.
Poor Ventilation Increases Mold Growth Risks
Another contributing factor to the growth of black mold on cinder blocks is poor ventilation. Areas with limited airflow can quickly become damp, creating an ideal environment for mold. Cinder block walls, especially in basements and utility rooms, may not get adequate ventilation, leading to stagnant air and moisture accumulation.
To combat this issue, homeowners should consider improving airflow in these areas. This may involve installing vents, using exhaust fans, or simply keeping doors and windows open to increase circulation. Good ventilation can help reduce humidity levels and dry out any moisture present on cinder blocks, thereby hindering mold growth.
Condensation: A Hidden Cause
Condensation often goes unnoticed but can be another hidden cause of black mold on cinder blocks. When warm, humid air comes into contact with cooler surfaces, such as cinder block walls, moisture in the air condenses into water droplets. This can create a damp environment where mold can thrive.
To reduce condensation, it is important to manage indoor humidity levels. Using dehumidifiers and maintaining a consistent temperature throughout the home can help prevent the conditions that lead to condensation. Additionally, insulating cinder block walls can help reduce temperature differences, minimizing the risk of moisture accumulation.
Cracks and Leaks: Pathways for Mold
Physical damage to cinder blocks, such as cracks or leaks, can provide pathways for water to enter, increasing the likelihood of mold growth. These flaws can be the result of settling foundations, weathering, or other forms of wear and tear over time. Once water begins to infiltrate through these cracks, it can become trapped within the blocks, fostering an environment ripe for mold development.
Homeowners should regularly inspect their cinder block structures for signs of damage. Timely repairs can prevent small issues from becoming larger ones. Sealing cracks and repairing leaks with appropriate materials will help keep moisture from entering the blocks, reducing the potential for mold growth.
Organic Material: A Nutrient Source for Mold
While cinder blocks themselves do not provide organic material for mold, other building materials and environmental factors can introduce nutrients that support mold development. For instance, dirt, dust, and debris settling on the surface of the blocks can provide a food source for mold spores. Additionally, if there are any wooden structures or organic matter nearby, they can contribute further to mold growth.
To reduce the presence of organic material, regular cleaning of cinder block surfaces is essential. Sweep or vacuum away dirt and dust to minimize the organic nutrients available for mold. Furthermore, addressing any nearby sources of organic matter, such as decaying plants or wood, can also help control mold growth.
Temperature Conditions Favoring Mold
Temperature plays a critical role in mold growth, with warmer conditions being more conducive to development. Black mold thrives in temperatures between 60°F and 80°F, making it particularly problematic during warm summer months when humidity levels can also rise.
To combat these conditions, maintaining a consistent and comfortable indoor temperature can help inhibit mold development. Using air conditioning during hot weather can help lower humidity levels and create an environment that discourages mold.
Importance of Regular Maintenance
Regular maintenance of your home is crucial in preventing mold growth on cinder blocks and other surfaces. This includes checking for moisture issues, ensuring good drainage around the property, and conducting regular inspections. Moreover, keeping gutters clean and ensuring downspouts direct water away from the foundation can significantly reduce the risk of water intrusion.
Investing time in routine checks can save homeowners from costly mold remediation efforts in the long run. A proactive approach not only addresses current issues but also helps identify potential problems before they become severe.
Remediating Mold on Cinder Blocks
If black mold is already present on cinder blocks, immediate action is necessary. The first step is to assess the extent of the mold growth. For small areas, a DIY approach may suffice. Homeowners can use a mixture of water and detergent to scrub the mold off the surface. Protective gear, such as gloves and a mask, should be worn to avoid inhaling mold spores.
In more severe cases, hiring a professional mold remediation service is advisable. They have the expertise and equipment to effectively remove mold and address the underlying moisture issues that allowed it to grow in the first place.
Conclusion
Black mold on cinder blocks poses risks to both the integrity of your home and the health of its occupants. Understanding the causes—such as excessive moisture, poor ventilation, cracks, condensation, and the presence of organic material—can empower homeowners to take preventative measures. Regular maintenance and timely repairs play crucial roles in creating an environment unfriendly to mold. By staying vigilant, homeowners can enjoy a safe, healthy living space free from the dangers of black mold.
FAQs
1. What are the health effects of black mold exposure?
Black mold exposure can cause various health issues, particularly respiratory problems, allergies, and headaches. It is essential to address mold growth promptly to mitigate these health risks.
2. Can I remove black mold from cinder blocks myself?
Yes, for small areas, you can remove black mold using a mixture of detergent and water. However, protective gear is recommended, and for larger infestations, professional help may be necessary.
3. How can I prevent black mold from returning after remediation?
To prevent black mold from returning, ensure good ventilation, control humidity levels, repair leaks, and keep the cinder block surfaces clean and dry.
4. Is it possible to seal cinder blocks against moisture?
Yes, applying a waterproof sealant can help protect cinder blocks from moisture intrusion, reducing the risk of mold growth.
5. How often should I check for mold in my home?
Regular checks are advisable, especially in areas prone to moisture like basements and crawl spaces. Aim for at least once every season, or more frequently if you notice any signs of water intrusion or humid conditions.

 DIY Closet1 year ago
How to troubleshoot and reset the red light on your Aquaguard AG 3000E

 DIY Closet1 year ago
How to Install a Drop-In Sink Without Clips: A Step-by-Step Guide

 Bug Fixing1 year ago
Understanding the Cost of Furnace Collector Box Replacement: What to Expect

 DIY Closet1 year ago
Pergola Design: Understanding the Maximum Span for 6×6 Beams

 DIY Closet1 year ago
The Best Nails for Luan: A Comprehensive Guide

 Bug Fixing1 year ago
Pigtail vs Daisy Chain Outlets: Which is Better for Your Home?

 DIY Closet1 year ago
How to Build a Free Standing 6×6 Post Swing Set: A Step-by-Step Guide

 DIY Closet1 year ago
Understanding the Benefits of a 400 Amp Meter Base with Two 200 Amp Disconnects


