
Bug Fixing
Expert Tips: How to Locate and Access Underground Water Lines

[ad_1]
Do you want to learn how to locate and access underground water lines? In this article, we will discuss expert tips on how to do this yourself. We will cover the tools and techniques you can use to find and access water lines on your property. Whether you need to repair them, install new lines, or just want to understand how your water system works, these tips will help you get the job done. Read on to learn more about this essential DIY skill.
What tools do I need to locate underground water lines?
Locating underground water lines requires the use of specialized tools. One of the most common tools used for this task is a pipe and cable locator. This device uses electromagnetic signals to locate metallic water lines buried beneath the ground. These locators come in different models and can be either purchased or rented from hardware stores. For non-metallic lines, a ground-penetrating radar (GPR) may be needed to locate them. This tool provides a visual image of what lies beneath the surface, allowing you to identify the path of the water lines.
Once you have located the water lines, you will need a shovel and other excavation tools to access them. Depending on the depth and location of the lines, you may also need a backhoe or other heavy machinery to excavate the area safely and effectively.
What are the techniques for locating underground water lines?
The most common technique for locating underground water lines is using a pipe and cable locator. To do this, you will need to attach a transmitter to one end of the water line. The transmitter sends electromagnetic signals through the line, which can be picked up by the receiver on the locator. By tracing the path of the signals, you can determine the location and depth of the water line.
For non-metallic water lines, using a ground-penetrating radar (GPR) is an effective technique. This tool emits high-frequency radar waves into the ground and records the reflections to create a visual image of what lies beneath the surface. By analyzing the GPR data, you can identify the location and depth of the water lines.
How do I access underground water lines?
Accessing underground water lines requires careful excavation to avoid damaging the lines. Once you have located the water lines using the appropriate tools and techniques, you will need to carefully excavate the area around the lines using a shovel and other excavation tools. It is important to dig slowly and cautiously to avoid hitting the water lines, as this could cause costly damage and potential water leakage.
If the water lines are buried deep or in a difficult-to-access location, you may need to use heavy machinery such as a backhoe to excavate the area safely. It is essential to follow local regulations and obtain any necessary permits before using heavy machinery for excavation.
How can I ensure safety when working with underground water lines?
Working with underground water lines can be hazardous, so it is essential to prioritize safety at all times. Before beginning any work, it is crucial to locate and mark any other underground utilities such as gas lines, electrical lines, and sewer lines to avoid accidental damage. Additionally, wearing protective gear such as gloves, safety glasses, and sturdy footwear can help minimize the risk of injury.
It is also important to use caution when excavating the area around the water lines to avoid hitting and damaging them. If heavy machinery is needed for excavation, it is essential to operate it carefully and follow all safety guidelines to prevent accidents and injuries.
Conclusion
Locating and accessing underground water lines is an essential skill for homeowners and DIY enthusiasts. By using the right tools and techniques, you can effectively locate and access water lines on your property, whether for repairs, installations, or understanding your water system. Prioritizing safety and following local regulations and guidelines will help ensure a successful and safe outcome.
FAQs
1. Can I use a metal detector to locate underground water lines?
No, a metal detector is not suitable for locating underground water lines. Metal detectors are designed to locate metallic objects such as jewelry and coins, and they are not capable of detecting water lines buried beneath the ground. For this task, a pipe and cable locator or ground-penetrating radar (GPR) is the appropriate tool to use.
2. Are there any risks associated with excavating around underground water lines?
Yes, there are risks associated with excavating around underground water lines. It is essential to proceed with caution to avoid damaging the lines, which could lead to water leakage and costly repairs. It is also crucial to locate and mark any other underground utilities before excavation to prevent accidental damage to them.
3. Do I need a permit to excavate around underground water lines?
Depending on your location, you may need to obtain a permit before excavating around underground water lines. Local regulations vary, so it is important to check with your municipality or local utility company to determine if a permit is required for this type of work.
4. Can I use a shovel to access underground water lines?
Yes, a shovel can be used to access underground water lines, especially for smaller-scale excavations. However, if the water lines are buried deep or in a difficult-to-access location, you may need to use heavy machinery such as a backhoe for safe and effective excavation.
5. What should I do if I accidentally damage an underground water line?
If you accidentally damage an underground water line, it is essential to act quickly to minimize water leakage and potential damage. First, shut off the main water supply to prevent further water flow. Then, contact a professional plumber or utility company to assess and repair the damage as soon as possible.
[ad_2]
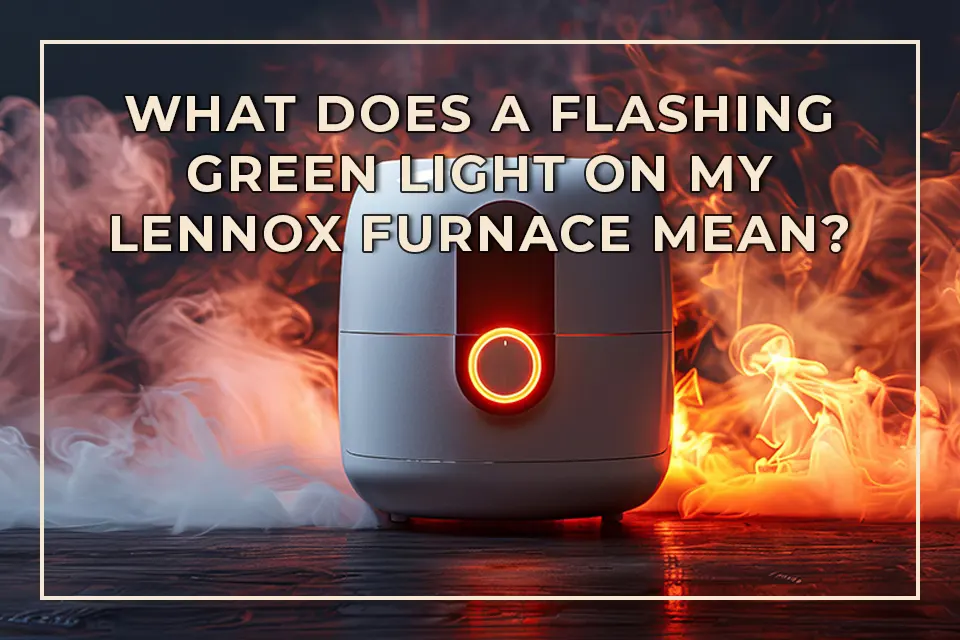
Understanding the functions and signals of your Lennox furnace is crucial for maintaining a comfortable and safe home environment. A flashing green light on your Lennox furnace can indicate various operational states or issues that need your attention. This guide will help you decipher what that signal means and what steps to take next.
The Importance of the Flashing Green Light
The furnace control panel features essential indicators, including the green light. This light serves as your furnace’s communication tool, alerting you to its operational status. A steady green light usually indicates that the furnace is functioning normally, while a flashing green light requires further investigation.
When you notice a blinking green light, it typically pertains to the furnace’s diagnostic system. Understanding what the flashing signals mean can save you time and money in troubleshooting or professional repair services. Knowing how to interpret these signals can empower you as a homeowner to maintain your furnace efficiently.
Common Reasons for a Flashing Green Light
- Normal Operation: While a steady green light often means everything is running well, a flashing green light is not automatically a cause for concern. This could indicate the furnace is starting a ignition process, signaling that it’s preparing to heat your home.
- Furnace Status Checks: A flashing green light may also mean the furnace is entering or going through a self-diagnostic check. In this case, the system examines its components for proper operation. Generally, the light may blink a specific number of times before turning steady, which can provide clues about issues.
- Error Codes: Different sequences of flashing patterns can represent unique error codes. For example, a flashing green light followed by a pause can indicate a problem with gas pressure or an issue with the ignition system. Refer to your user manual or manufacturer guidance to decode the pattern accurately.
Troubleshooting Steps When You See a Flashing Green Light
If you notice a flashing green light on your Lennox furnace, it’s essential to stay calm. Here’s how you might approach the situation:
1. Consult the Owner’s Manual: Your first step should be checking the furnace’s user manual for specific diagnostics. The manual often contains a section dedicated to interpreting light signals and error codes that are unique to your model.
2. Resetting the Furnace: Sometimes, a simple reset can clear temporary errors. Turn the furnace off at the thermostat, wait for a few moments, and then turn it back on. If the green light remains flashing, further investigation is needed.
3. Examine the Air Filters and Vents: Clogged air filters or blocked vents can create issues with airflow, leading to operational problems. Check and replace any dirty filters and ensure all vents are open and unobstructed.
Professional Intervention: When is it Necessary?
If troubleshooting doesn’t resolve the issue, it may be time to involve a professional. A flashing green light can indicate a more serious problem that requires specialized skills and tools to diagnose appropriately.
1. Persistent Flashing: If the green light doesn’t revert to a steady signal despite following the troubleshooting steps, it’s essential to seek help. Persistent issues often indicate underlying problems that only a certified technician can address safely.
2. Complex Errors: Some errors linked with a flashing green light involve complex furnace systems, such as ignition failures, gas supply issues, or electrical anomalies. Professionals can conduct in-depth diagnostics to identify the root cause and recommend repairs.
3. Routine Maintenance: Regardless of the flashing light, it’s wise to schedule regular furnace maintenance. Professional servicing can prevent future issues, optimize performance, and extend the lifespan of your system.
Understanding the Role of the Circuit Board
Modern Lennox furnaces feature advanced circuit boards that manage their operation. The circuit board interprets how the furnace functions, detects problems, and communicates them through the status lights.
1. Flashing Patterns: Each flashing pattern indicative of a specific state or issue is comprehended by the circuit board’s diagnostic program. If your furnace’s flashing green light signals a persistent issue, this could suggest a malfunctioning circuit board.
2. Updating Components: Circuit boards may require updates or replacement, especially in older models. Discussing with a professional can help you find the right solution if such a scenario is responsible for the flashing signal.
Enhancing Your Understanding for Future Repairs
A little knowledge can go a long way when it comes to repairing your heater. By understanding common indicators like the flashing green light, you can approach possible problems with confidence.
1. Documenting Patterns: Keeping a record of your furnace’s behaviors, including how the lights flash or change over time, can help service technicians understand the history of your unit, potentially leading to quicker resolutions.
2. Learning as You Go: Like many appliances in your home, regular interaction with your furnace can enhance your understanding. Familiarizing yourself with its sounds, lights, and operations can prepare you for recognizing when things are off, increasing your effectiveness in troubleshooting.
Conclusion
A flashing green light on your Lennox furnace plays a critical role in maintaining your home’s heating system’s health. While it can indicate several issues—from normal operational checks to the need for repairs—being informed helps you navigate the situation with confidence. Adopting a proactive stance through regular maintenance and understanding your unit’s communication signals can effectively prolong its lifespan.
FAQs
- What should I do if the flashing light continues after troubleshooting?
If the green light remains flashing after performing troubleshooting steps, it’s advisable to call a professional technician to diagnose and repair the underlying issue. - Can a dirty air filter cause a flashing light?
Yes, a dirty air filter can impede airflow, potentially causing your Lennox furnace to malfunction and trigger a flashing light. - How often should I perform maintenance on my furnace?
Regular maintenance is recommended at least once a year, preferably before the onset of colder weather, to ensure your furnace operates efficiently. - Is it safe to ignore the flashing green light?
Ignoring a flashing green light is not advisable, as it may indicate deeper issues within your furnace that could affect safety and efficiency. - Where can I find the diagnostic code for my specific furnace model?
You can find the diagnostic codes in your owner’s manual or on the Lennox website. Checking for your specific model’s guide will provide the necessary reference for error codes and light sequences.
[ad_1]
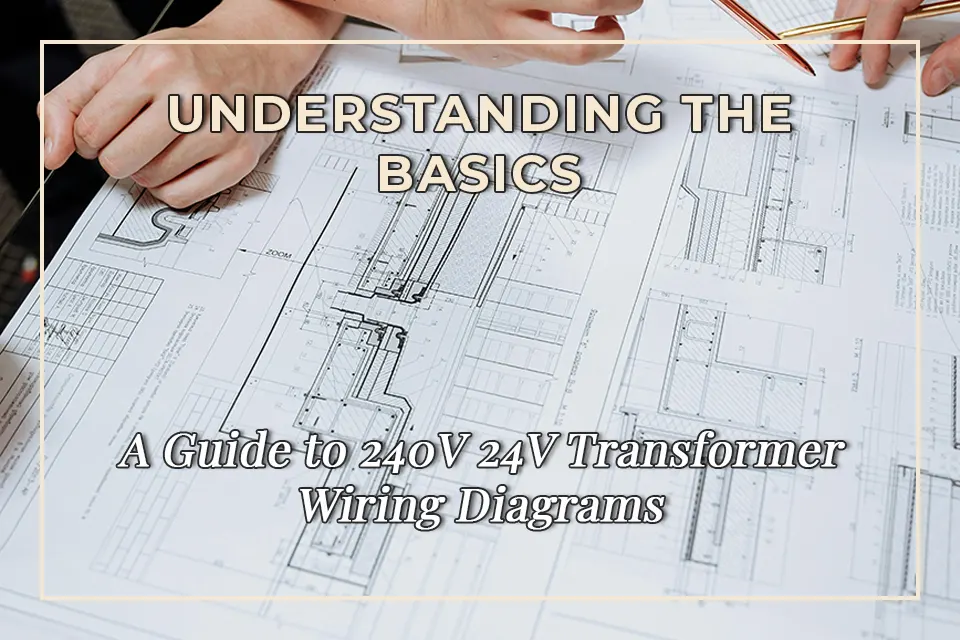
Looking to understand the basics of 240V 24V transformer wiring diagrams? This guide will help you navigate the ins and outs of transformer wiring, from understanding the components to making the right connections. Whether you’re a DIY enthusiast or a professional electrician, this article will provide you with the knowledge you need to tackle transformer wiring with confidence.
What is a 240V 24V Transformer and How Does It Work?
A 240V 24V transformer is a type of electrical transformer that is used to step down the voltage from a 240V power source to a 24V output. It consists of primary and secondary coils, with the primary coil receiving the 240V input and the secondary coil delivering the 24V output. The transformer works on the principle of electromagnetic induction, where the changing magnetic field induces a voltage in the secondary coil, resulting in a different voltage level than the input.
When the transformer is properly connected, it can provide the necessary voltage for low-voltage applications, such as powering thermostats, doorbells, and other control systems. Understanding the basics of how a 240V 24V transformer works is crucial for correctly wiring it in various applications.
How to Read a 240V 24V Transformer Wiring Diagram
Wiring diagrams for 240V 24V transformers typically show the connections between the primary and secondary coils, as well as any additional components such as fuses, switches, or terminals. The diagram will help you understand how to make the correct connections and ensure the transformer is properly installed.
When reading a wiring diagram, it’s important to pay attention to the color-coding of the wires, as well as any labels or markings on the transformer itself. This will help you identify the primary and secondary coils, as well as any other connections that need to be made. Following the wiring diagram accurately is essential for a safe and functional installation of the transformer.
Step-by-Step Guide to Wiring a 240V 24V Transformer
When it comes to wiring a 240V 24V transformer, it’s important to follow a step-by-step process to ensure the job is done correctly. Start by identifying the primary and secondary coils on the transformer, as well as any additional components that need to be connected. Then, make the necessary connections according to the wiring diagram, paying close attention to the color-coding and labeling as mentioned earlier.
After making the connections, it’s crucial to test the transformer to ensure it is functioning properly and delivering the correct voltage. This can be done using a multimeter to measure the output voltage and ensure it matches the specified level. Once the transformer is confirmed to be working as intended, it can be integrated into the relevant electrical system for its intended purpose.
Common Mistakes to Avoid When Wiring a 240V 24V Transformer
One of the most common mistakes when wiring a 240V 24V transformer is misidentifying the primary and secondary coils, leading to incorrect connections and potential damage to the transformer. It’s important to carefully review the wiring diagram and any labeling on the transformer to avoid this mistake. Additionally, using incorrect wire sizes or neglecting proper insulation can lead to safety hazards and diminished performance.
Another mistake to avoid is overlooking the need for proper grounding and protection measures, especially when working with higher voltage levels. Ensuring that the transformer installation complies with electrical codes and safety standards is essential for preventing accidents and ensuring the longevity of the equipment.
Conclusion
Understanding the basics of 240V 24V transformer wiring diagrams is essential for anyone working with electrical systems, from DIY enthusiasts to professionals. By grasping the fundamental principles of how these transformers work, reading wiring diagrams, and following a proper installation process, you can confidently tackle transformer wiring projects and ensure safe and reliable operation.
FAQs
Q: Can I use a 240V 24V transformer for other voltage levels?
A: No, a 240V 24V transformer is specifically designed to step down the voltage from 240V to 24V. Attempting to use it for other voltage levels can result in damage to the transformer and potential safety hazards.
Q: What should I do if I encounter a wiring diagram with unclear markings?
A: If you come across a wiring diagram with unclear markings, it’s best to consult the manufacturer’s documentation or seek guidance from an experienced electrician to ensure the correct connections are made.
Q: Are there any specific safety precautions to take when wiring a 240V 24V transformer?
A: Yes, it’s important to take precautions such as wearing insulated gloves, ensuring proper grounding, and following electrical codes to minimize the risk of electric shock and other safety hazards.
Q: Can I wire a 240V 24V transformer without a wiring diagram?
A: While it’s not recommended, it is possible to wire a transformer without a diagram if you have a thorough understanding of the transformer’s components and connections. However, using a wiring diagram is the best practice to ensure accuracy.
Q: What should I do if I suspect a problem with the transformer after it’s been wired?
A: If you suspect an issue with the transformer, such as incorrect voltage output or abnormal operation, it’s best to disconnect the power and seek assistance from a qualified electrician to diagnose and resolve the problem.
[ad_2]

[ad_1]
Are you in the habit of leaving your ice maker turned on even when there’s no water in the machine? If so, you may not be aware of the potential dangers associated with this common practice. In this article, we’ll discuss the risks of leaving an ice maker on without water, and what you need to know to prevent potential damage to your appliance. We’ll also provide some practical tips for maintaining your ice maker to avoid any costly repairs or replacements. Read on to learn more about the dangers of leaving an ice maker on without water, and how to avoid them.
What happens when you leave an ice maker on without water?
Leaving your ice maker turned on without water can lead to a range of issues that can affect the performance of the machine. One of the most common problems is the build-up of ice inside the ice maker, which can cause the machine to malfunction and stop producing ice. Additionally, the lack of water in the machine can also lead to the motor working harder, which can potentially cause overheating and damage to the appliance over time.
When an ice maker is left on without water, it can also lead to the development of mold and mildew inside the machine, as well as an unpleasant odor. This can not only affect the taste and quality of the ice produced but also pose potential health risks to those consuming the ice.
How to prevent damage to your ice maker
One of the most effective ways to prevent damage to your ice maker is to ensure that the machine is always turned off when there is no water supply. This simple step can help to avoid the build-up of ice, reduce the strain on the motor, and prevent the development of mold and mildew inside the machine.
Regularly cleaning and maintaining your ice maker is also essential to prevent damage and ensure optimal performance. This includes regularly removing any built-up ice and debris, as well as cleaning the interior of the machine to prevent the growth of mold and mildew. Following the manufacturer’s guidelines for maintenance and cleaning can help to extend the lifespan of your ice maker and reduce the likelihood of any costly repairs.
Can leaving an ice maker on without water cause damage to your home?
Leaving an ice maker on without water can potentially cause damage to your home, especially if the appliance malfunctions and leaks water. The build-up of ice in the machine can lead to excess water spilling onto the floor, which can result in water damage to your kitchen or surrounding areas. Additionally, if the motor overheats due to the lack of water, it can pose a fire hazard, which can be a serious risk to your home and safety.
To prevent any potential damage to your home, it’s essential to ensure that your ice maker is always turned off when not in use, and to regularly inspect the machine for any signs of leaks or malfunctions. If you notice any issues with your ice maker, it’s important to address them immediately to prevent any further damage to your home or appliance.
How can you tell if your ice maker has been damaged due to lack of water?
There are several signs that may indicate that your ice maker has been damaged due to the lack of water. These can include a decrease in ice production, unusual noises coming from the machine, or a change in the taste or quality of the ice produced. If you notice any of these signs, it’s important to turn off your ice maker and inspect the machine for any visible damage, such as ice build-up or leaks.
If you suspect that your ice maker has been damaged due to the lack of water, it’s essential to contact a professional appliance repair technician to assess the extent of the damage and make any necessary repairs. Ignoring potential damage to your ice maker can lead to further issues and potentially result in the need for a costly replacement.
Conclusion
Leaving an ice maker on without water can pose several risks, including potential damage to the appliance and your home. To prevent any issues, it’s important to ensure that your ice maker is always turned off when not in use, and to regularly clean and maintain the machine to prevent the build-up of ice and mold. By following these simple tips, you can help to prolong the lifespan of your ice maker and avoid any costly repairs or replacements.
FAQs
1. Can leaving an ice maker on without water cause damage to the appliance?
Yes, leaving an ice maker on without water can lead to the build-up of ice, strain on the motor, and potential damage to the appliance over time. It can also lead to the development of mold and mildew inside the machine, affecting the taste and quality of the ice produced.
2. How can I prevent potential damage to my ice maker?
To prevent potential damage to your ice maker, ensure that the machine is always turned off when there is no water supply. Additionally, regularly cleaning and maintaining your ice maker can help to prevent the build-up of ice and mold, ensuring optimal performance.
3. Can leaving an ice maker on without water cause damage to my home?
Leaving an ice maker on without water can potentially cause damage to your home if the appliance malfunctions and leaks water onto the floor. It can also pose a fire hazard if the motor overheats due to the lack of water.
4. How can I tell if my ice maker has been damaged due to lack of water?
Signs of potential damage to your ice maker due to the lack of water can include a decrease in ice production, unusual noises coming from the machine, and a change in the taste or quality of the ice produced. If you notice any of these signs, it’s important to turn off your ice maker and inspect the machine for any visible damage.
5. What should I do if I suspect my ice maker has been damaged?
If you suspect that your ice maker has been damaged due to the lack of water, it’s essential to contact a professional appliance repair technician to assess the extent of the damage and make any necessary repairs. Ignoring potential damage to your ice maker can lead to further issues and potentially result in the need for a costly replacement.
[ad_2]

Free Closet Cost Calculator — Estimate Your Project Budget Instantly

Is It Safe to Have a Water Heater in the Attic? Everything Homeowners Need to Know

Transform Your Entryway: A Step-by-Step Guide to Painting Metal Doors with Latex Paint

Clear Solutions: A Guide to Replacing Glass on TDL Windows

Transform Your Space: Why a Sliding Glass Door is the Perfect Upgrade from a Roller Door

Free Closet Cost Calculator — Estimate Your Project Budget Instantly
This post contains affiliate links. If you purchase through these links, we may earn a small commission at no extra...

Is It Safe to Have a Water Heater in the Attic? Everything Homeowners Need to Know
Having a water heater in the attic is more common than you might think — especially in Southern states where...

Transform Your Entryway: A Step-by-Step Guide to Painting Metal Doors with Latex Paint
Painting a metal door can seem like an overwhelming task, especially if you’re not sure where to start. However, painting...

Clear Solutions: A Guide to Replacing Glass on TDL Windows
Replacing glass on TDL (Thermal Double-Layer) windows may seem daunting at first, but it’s a task that can significantly enhance...

Transform Your Space: Why a Sliding Glass Door is the Perfect Upgrade from a Roller Door
Introduction to Replacing Roller Doors with Sliding Glass Doors When it comes to enhancing your home’s aesthetic and functionality, one...


The Perfect Timing: How Long to Let Grout Dry Before Sponging
Grout is an essential component in tiled installations, providing both aesthetics and stability. Knowing how long to let grout dry...


Blast Away the Old: How to Effectively Remove Paint with a Pressure Washer
Removing paint from surfaces can be a daunting task, but using a pressure washer can make it easier, faster, and...


Skim Coat vs. Primer: What’s the Best Base for Your Walls?
In the world of home improvement, the terms skim coat and primer often come up, especially when preparing surfaces for...


Wagner Control Pro 130: Revolutionizing Your Painting Experience
The Wagner Control Pro 130 is a high-performance airless paint sprayer designed for both DIY enthusiasts and professionals alike. Its...


Why Do Window Sticks Extend Past Siding?
When renovating or building a home, you might notice that window sills or trim often extend beyond the siding. This...
 DIY Closet2 years ago
How to troubleshoot and reset the red light on your Aquaguard AG 3000E

 DIY Closet2 years ago
How to Install a Drop-In Sink Without Clips: A Step-by-Step Guide

 Bug Fixing2 years ago
Understanding the Cost of Furnace Collector Box Replacement: What to Expect

 DIY Closet2 years ago
Pergola Design: Understanding the Maximum Span for 6×6 Beams

 DIY Closet2 years ago
The Best Nails for Luan: A Comprehensive Guide

 Bug Fixing2 years ago
Pigtail vs Daisy Chain Outlets: Which is Better for Your Home?

 DIY Closet2 years ago
How to Build a Free Standing 6×6 Post Swing Set: A Step-by-Step Guide
 DIY Closet2 years ago
Understanding the Benefits of a 400 Amp Meter Base with Two 200 Amp Disconnects