DIY Closet
DIY 101: How to Remove a Doorknob with No Screws

[ad_1]
In this article, we will discuss the step-by-step process of removing a doorknob with no screws. Whether you are a DIY enthusiast or just trying to fix a stubborn doorknob, this guide will help you successfully remove a doorknob without any hassle.
How do I know if my doorknob has no screws?
First, examine your doorknob to determine whether it has no visible screws. Many modern doorknobs are designed with concealed screw systems to maintain a sleek look. If you cannot locate any screws on the plate or collar of the doorknob, it is likely that the screws are hidden.
To confirm, try to twist and pull apart the doorknob gently. If it doesn’t easily come off, then it’s a clear indication that the screws are hidden within the doorknob assembly.
What tools do I need to remove a doorknob with no screws?
Before starting the removal process, gather a few essential tools such as a flathead screwdriver, a small Allen wrench, and a thin metal object (such as a paper clip or a thin nail). These tools will help you to access and disassemble the doorknob without causing any damage.
Step-by-step guide to removing a doorknob with no screws:
Here is a simple, step-by-step guide to removing a doorknob with no visible screws:
- Insert the flathead screwdriver into the slot on the shank of the doorknob. Gently pry the cover plate away from the door to reveal the inner mechanisms.
- For lever-style doorknobs, locate the small pinhole on the lever handle. Insert the Allen wrench into the hole and turn it clockwise to release the handle from the spindle.
- Once the cover plate is removed, use the flathead screwdriver or a thin metal object to depress the spring-loaded tab inside the knob. This will allow you to separate the knob from the spindle.
- After removing the knob, you can access the screws that hold the mounting plate in place. Use the flathead screwdriver to loosen and remove these screws.
- Finally, separate the mounting plate from the door, and the doorknob will be completely removed.
Can I reassemble the doorknob after removing it?
Yes, you can easily reassemble the doorknob by following the reverse steps of the removal process. Make sure to position all the components correctly and secure them in place to ensure the doorknob functions properly.
Conclusion
Removing a doorknob with no visible screws may seem daunting at first, but with the right tools and knowledge, it can be a straightforward task. By following the step-by-step guide in this article, you can successfully remove and reassemble a doorknob, giving you the confidence to tackle DIY projects around your home.
FAQs
1. Can I use any flathead screwdriver to remove the cover plate of the doorknob?
Yes, any standard flathead screwdriver should work for removing the cover plate of the doorknob, as long as it fits into the slot on the shank of the knob.
2. What if the doorknob still doesn’t come off after following the removal steps?
If the doorknob does not easily come off, try applying some lubricant or penetrating oil to the area where the knob meets the door. This can help loosen any stuck components and make the removal process easier.
3. What should I do if I encounter any resistance when trying to remove the mounting plate?
If the mounting plate is difficult to remove, double-check to ensure that all screws have been fully loosened. If there is still resistance, try gently tapping the plate with a rubber mallet to dislodge any stuck components.
4. Can I use the same method to remove different types of doorknobs, such as privacy or passage knobs?
Yes, the same general method can be used to remove various types of doorknobs, but the specific removal steps may vary slightly depending on the design of the knob. Refer to the manufacturer’s instructions for any specific guidelines for your particular type of doorknob.
5. Are there any safety precautions I should take when removing a doorknob?
Before starting the removal process, ensure that the area around the door is clear of any obstacles or hazards to prevent accidents. Also, be cautious when handling tools to avoid any potential injuries.
[ad_2]
DIY Closet
Transform Your Entryway: A Step-by-Step Guide to Painting Metal Doors with Latex Paint

Painting a metal door can seem like an overwhelming task, especially if you’re not sure where to start. However, painting a metal door with latex paint can significantly enhance your home’s appearance and provide a protective layer against the elements. In this article, we’ll explore everything from the importance and benefits of painting metal doors to a step-by-step guide on how to do it effectively.
Understanding Metal Doors and Latex Paint
Metal doors are popular choices for exterior and interior use due to their durability and security features. They can withstand harsh weather conditions, resist warping, and provide an excellent barrier against break-ins. When it comes to coatings, latex paint stands out as a versatile option for painting metal doors.
Latex paint, which is water-based, provides numerous advantages over oil-based paints, including easier cleanup, faster drying times, and low toxicity. This makes it suitable for both beginners and seasoned DIY enthusiasts looking to spruce up their doors without the hassles associated with more traditional paint types.
The Importance of Painting Metal Doors
Painting metal doors is not just an aesthetic choice; it also serves a functional purpose. Over time, metal doors can develop rust, corrosion, or unattractive scuffs and scratches. A fresh coat of paint helps to protect the metal from these elements, extending the door’s lifespan and maintaining its structural integrity.
Additionally, painting your door can improve curb appeal. A visually appealing entrance creates a welcoming atmosphere for guests and enhances your home’s overall appearance. Whether you’re preparing to sell your house or simply want to enjoy your living space more, a well-painted metal door can make a significant difference.
Benefits of Painting Metal Doors with Latex Paint
Enhanced Durability
One of the standout benefits of using latex paint on metal doors is its durability. Latex paint is formulated to withstand chipping, fading, and peeling, particularly when you choose high-quality options. This means your door will maintain its fresh look for years to come.
Easy Application
Latex paint is user-friendly. It can be applied with a brush, roller, or spray painter. For beginners, using a roller or brush is generally more manageable than spray painting, which requires more skill. The smooth application of latex paint makes it easier to achieve a professional finish.
Quick Drying Time
Unlike oil-based paints that can take several hours to dry, latex paints typically dry quickly. You can apply multiple coats in a single day, greatly speeding up the process. This is particularly beneficial if you’re on a tight schedule.
Low VOC and Easy Cleanup
Latex paints have low Volatile Organic Compounds (VOCs), making them safer for indoor use. This means fewer harmful fumes, making it a healthier choice for your home. Also, cleanup is as simple as using soap and water instead of requiring mineral spirits or other harsh chemicals.
Step-by-Step Guide to Painting a Metal Door with Latex Paint
Step 1: Gather Your Materials
Before starting, gather all the materials you’ll need, including:
- Latex paint (preferably exterior grade if the door is exposed to the elements)
- Primer (if needed)
- Sandpaper (medium and fine grit)
- Cleaning supplies (soap, water, cloth)
- Primer brush or roller
- Paintbrush or roller
- Paint tray
- Drop cloth or newspaper
- Painter’s tape
- Protective gear (gloves and a mask)
Step 2: Clean the Door
Before you can paint, you need to prepare the surface. Begin by cleaning the door with soapy water and a cloth to remove any dirt, grease, or grime. After cleaning, rinse with water and let the door dry completely.
Step 3: Sand the Surface
Next, use medium grit sandpaper to lightly sand any rough areas or previous paint. Sanding helps create a better surface for the paint to adhere to. After sanding, switch to fine grit sandpaper to smooth the surface. Wipe down the door again with a damp cloth to remove dust particles.
Step 4: Apply Primer (If Necessary)
If the metal door has significant rust or if you’re changing colors drastically, applying a primer is recommended. Use a primer specifically designed for metal surfaces. Apply it in an even coat, allowing it to dry according to the manufacturer’s instructions.
Step 5: Paint the Door
Begin painting your metal door with latex paint using a brush and roller. Start with the edges and corners using a brush, then use a roller for the flat surfaces. Apply thin, even coats, and avoid overloading the roller or brush with paint to prevent drips.
Step 6: Allow to Dry and Add Additional Coats
After the first coat dries completely, inspect the door. If necessary, sand lightly between coats for smoother results. Typically, two to three coats of latex paint will provide optimal coverage and durability.
Step 7: Reattach Hardware and Let Cure
Once the final coat dries, reattach any hardware (knobs, locks, etc.) you may have removed. Ensure everything is secure. While latex paint dries quickly, it’s best to allow it to cure for several days before exposing it to harsh weather.
Tips for a Successful Paint Job
- Choose the Right Day: Try to paint on a dry day with a temperature range recommended in the paint can’s instructions. High humidity can affect drying.
- Use Quality Paint: Invest in high-quality latex paint for improved durability and finish.
- Practice Techniques: Before you begin on the door, practice your brush and roller techniques on a piece of cardboard to understand how much paint to apply.
- Patience is Key: Allow adequate drying time between coats and don’t rush the process. A well-done job is more rewarding in the long run.
Common Mistakes to Avoid When Painting a Metal Door
Skipping the Preparation
One of the most common mistakes is neglecting thorough cleaning and sanding. Skipping these steps often results in poor paint adhesion and an unattractive finish.
Painting on a Damp Surface
Make sure the door is completely dry before applying primer or paint. Painting on a damp surface can trap moisture, leading to eventual peeling or bubbling.
Neglecting to Check the Weather
It’s crucial to check the weather forecast. Painting in direct sunlight or during rainy conditions can ruin your work. Temperature swings can impact drying time and the overall quality of the finish.
FAQs About Painting Metal Doors with Latex Paint
Can you paint a metal door without primer?
While it’s possible to paint directly onto a metal surface with latex paint, using a primer enhances adhesion, especially if the door has rust or if you are changing colors dramatically.
How long does latex paint take to cure on a metal door?
Latex paint generally dries to the touch within an hour, but it can take up to two weeks to fully cure. It’s best to avoid heavy use ofthe door during this period to ensure the longevity of the finish.
What type of latex paint is best for metal doors?
Choose an exterior-grade latex paint formulated for metal. These paints offer better protection against moisture, UV rays, and temperature fluctuations.
Can I paint a metal door if it has been previously painted with oil-based paint?
Yes, but you’ll need to sand the surface to create a good bond for the latex paint. Applying a suitable primer designed for oil-based surfaces may also be necessary.
Is it safe to paint a metal door indoors?
Yes, latex paint has low VOCs, making it safer for indoor applications. However, ensure adequate ventilation while painting to minimize exposure to any fumes.
How do I clean the painted door in the future?
You can clean the painted metal door using mild soap and water. Avoid using harsh chemicals or abrasive cleaners, as these can damage the paint.
Conclusion: Transforming Your Metal Door with Latex Paint
Painting a metal door with latex paint is not only a fulfilling DIY project but also a fantastic way to improve your home’s appearance and durability. With the right preparation, materials, and techniques, you can achieve a beautiful finish that stands the test of time. Remember to take your time, pay attention to detail, and don’t hesitate to seek assistance if needed. By following this comprehensive guide, you can confidently tackle the project and enjoy a revitalized entrance that enhances curb appeal and adds personality to your home.
Whether it’s a front door, a back door, or a garage door, embracing the beauty and protection that a fresh coat of paint offers will surely enhance your living space. Happy painting!
DIY Closet
Clear Solutions: A Guide to Replacing Glass on TDL Windows

Replacing glass on TDL (Thermal Double-Layer) windows may seem daunting at first, but it’s a task that can significantly enhance the comfort and aesthetics of your home. This article will walk you through everything you need to know about replacing glass on TDL windows, including its importance, the step-by-step process, and tips to ensure a successful job.
Understanding TDL Windows
TDL windows, or Thermal Double-Layer windows, are designed with energy efficiency in mind. They consist of two layers of glass with a space in between filled with argon or another gas, which serves as an insulator. This feature helps maintain indoor temperatures, reduces energy costs, and minimizes outside noise.
When the glass in a TDL window gets damaged—be it by a storm, an accidental hit, or even wear and tear—it can compromise all these benefits. Understanding how to replace the glass promptly can restore the window’s energy efficiency and aesthetic appeal.
The Importance of Replacing Glass on TDL Windows
Replacing glass on TDL windows isn’t just a matter of looks; it’s essential for various reasons:
- Safety Concerns: Broken glass can pose safety hazards, especially for children and pets. Replacing damaged glass removes the risk of injury from sharp edges.
- Aesthetic Appeal: A window with clear, unbroken glass enhances curb appeal. A damaged window can make your home appear neglected.
- Property Value: Keeping your windows in good condition can increase your property’s value, attracting potential buyers should you decide to sell.
- Protection from Elements: Replacing the glass can also prevent water leaks and further damage to window frames, protecting your home from mold and deterioration.
Benefits of Replacing Glass on TDL Windows
The benefits of replacing glass on TDL windows extend beyond mere aesthetics. They include:
- Improved Insulation: Modern replacement glass typically comes with better insulation properties. You’ll find options with low-emissivity (Low-E) coatings that reflect heat back inside during winter and keep it out during summer.
- Lower Utility Bills: As your home’s energy efficiency improves, you can expect a reduction in monthly utility bills.
- Enhanced Comfort: Properly sealed and insulated windows help maintain a consistent indoor temperature, making your home more comfortable year-round.
- UV Protection: Replacing old glass with new, treated glass can offer better UV protection, helping to keep your furniture and carpets from fading.
- Noise Reduction: New glass technology can also help with reducing noise from the outside, creating a quieter home environment.
Step-by-Step Guide: How to Replace Glass on TDL Windows
Replacing glass on TDL windows might sound intimidating, but breaking the process down into manageable steps makes it straightforward. Here’s a step-by-step guide:
Step 1: Gather Your Tools and Materials
You’ll need:
- Safety goggles and gloves
- A utility knife
- A glass cutter
- Measuring tape
- Replacement glass (cut to size)
- Silicone sealant
- Putty knife
- Glazing points or clips
- A clean cloth
Step 2: Measure the Glass
The first step in replacing glass on TDL windows is to accurately measure the existing glass pane. Use a measuring tape and write down the dimensions. Ensure you measure the height and width at multiple points to account for any irregularities.
Step 3: Remove the Old Glass
Using a utility knife, carefully cut through any paint or sealant around the glass. If the glass is broken, be extra careful. Remove any shards and then use your putty knife to pry out the old glass. Ensure you remove all the glazing points or clips securing it in place.
Step 4: Clean the Frame
Once the old glass is removed, clean the window frame thoroughly. Remove any debris, old sealant, or paint remnants. Your new glass will adhere better to a clean surface.
Step 5: Install the New Glass
Apply a bead of silicone sealant around the frame’s edge where the glass will sit. Place the new glass pane in the frame, ensuring it fits snugly. Secure it with glazing points or clips to hold it in place.
Step 6: Seal the Edges
Once the glass is securely placed, apply another bead of silicone sealant around the edges. This will help create a weather-tight seal, enhancing insulation and preventing water leaks.
Step 7: Clean Up
After installation, carefully clean any excess sealant or debris from the glass surface and frame. Replace any window trim that you had to remove during the process.
Tips for Successfully Replacing Glass on TDL Windows
Safety First: Always wear protective gear like gloves and goggles when working with glass. Sharp edges can pose a risk of injury.
Get Accurate Measurements: Take your time to measure several times. An accurate fit will make your installation easier and more effective.
Consider Professional Help: If you’re not confident in handling glass work, consider hiring a professional. Mistakes can be costly and may worsen the issue.
Check for UV Coatings: When purchasing replacement glass, consider those with UV resistance to protect your interior from sun damage.
Evaluate Frame Condition: Before installing the new glass, check the frame for rot or damage. If the frame is compromised, you may need to repair or replace it as well.
Common Mistakes to Avoid When Replacing Glass on TDL Windows
Not Sealing Correctly: Failing to apply sealant around the edges can lead to air or water leaks. Always ensure a proper seal.
Poor Measurements: Inaccurate measurements can lead to a poor fit. Double-check all dimensions before cutting your new glass.
Ignoring Frame Condition: Overlooking frame damage can lead to future issues. Always inspect your window frame before installation.
Skipping the Cleaning Process: Failing to clean the frame thoroughly can lead to adhesion issues. Always remove old debris for best results.
FAQs About Replacing Glass on TDL Windows
How much does it cost to replace glass on TDL windows?
The cost can vary significantly based on glass type and window size, typically ranging from $100 to $500 for a professional installation. DIY costs may be lower, depending on materials used.
How long does it take to replace glass on TDL windows?
The time frames depend on skill level and whether complications arise, but most single-pane replacements can be done in under two hours.
Can I replace glass on TDL windows myself?
Yes, it’s a manageable DIY project if you’re comfortable with basic tools. However, hiring a professional may ensure a more reliable outcome.
Are TDL windows energy-efficient?
Yes, TDL windows are designed to maximize energy efficiency due to their double-layer glass and insulated gaps, helping reduce heating and cooling costs.
Conclusion: Replacing Glass on TDL Windows for Better Living
Replacing glass on TDL windows is an essential task that can enhance not only the aesthetic appeal of your home but also improve energy efficiency, safety, and comfort. By following the outlined steps and tips, homeowners can tackle this job with confidence. Remember, if you feel uncertain at any stage, it’s always wise to consult a professional. Investing the time and resources now can lead to a more comfortable and aesthetically pleasing home for years to come.
DIY Closet
Transform Your Space: Why a Sliding Glass Door is the Perfect Upgrade from a Roller Door
Introduction to Replacing Roller Doors with Sliding Glass Doors
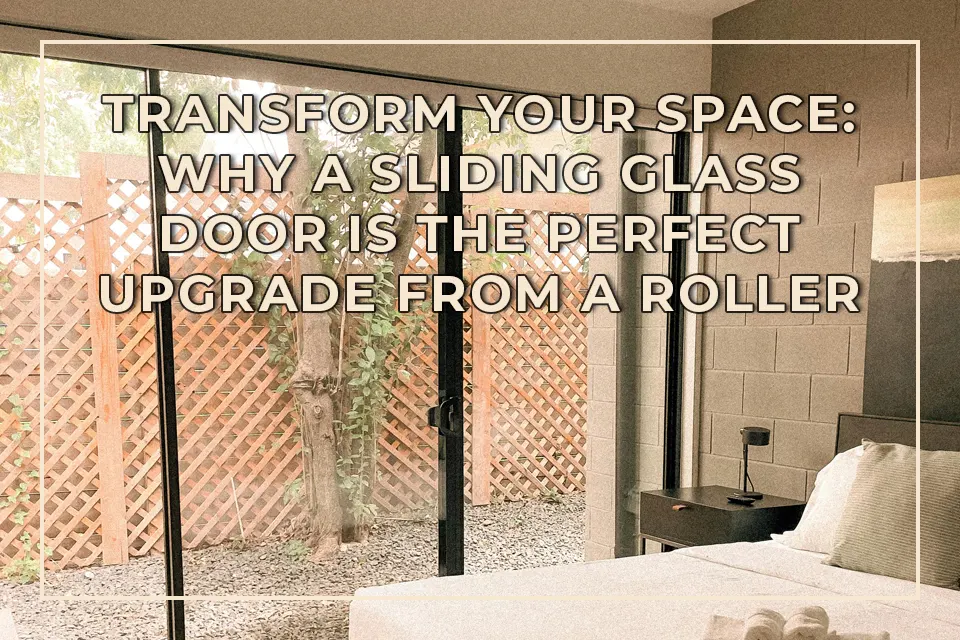
When it comes to enhancing your home’s aesthetic and functionality, one of the most transformative changes you can make is replacing your old roller door with a sliding glass door. Roller doors, often found in garages and commercial spaces, offer convenience and security but can sometimes be bulky and unattractive. On the other hand, sliding glass doors provide a contemporary look while allowing natural light to flood into your spaces. In this comprehensive guide, we’ll delve into the importance and benefits of switching from a roller door to a sliding glass door, provide a step-by-step guide on how to make the transition, offer insider tips, address common mistakes, and answer your frequently asked questions.
The Importance of Choosing the Right Door
Choosing the right door for your home is more than just a matter of aesthetics; it is crucial for functionality, security, and energy efficiency. In many households, the door serves as the primary entry and exit point, making it essential to select a type that balances style with performance. Roller doors, while effective for security and ease of operation, often fail to make a pleasing architectural statement. By opting for a sliding glass door, homeowners can effectively merge beauty with practicality.
Sliding glass doors not only improve the visual appeal of your space but can also enhance the overall ambiance of your home. They enable a seamless transition between indoor and outdoor areas, making your living spaces feel larger and more open. In essence, the right choice of door is foundational to creating a home that reflects your style and meets your daily needs.
Benefits of Replacing Roller Doors with Sliding Glass Doors
Enhanced Aesthetic Appeal
First and foremost, sliding glass doors introduce elegance and modernity to both the interior and exterior of your home. With an array of designs to choose from, homeowners can pick doors that complement their décor and improve curb appeal. This upgrade can significantly increase your property’s overall value.
Improved Natural Light
Sliding glass doors can flood your living area with natural light, creating a welcoming atmosphere. Natural light is known to enhance mood and overall well-being, making your home a more pleasant place to live. Unlike roller doors, which often block light, sliding glass doors allow for unobstructed views of your garden, patio, or backyard.
Better Energy Efficiency
Today’s sliding glass doors come equipped with advanced insulation technologies and energy-efficient glass. This means that while they let in sunlight, they also help to maintain the interior temperature of your home. As a result, they can keep your energy bills in check by reducing your dependence on heating and cooling systems.
Seamless Indoor-Outdoor Living
One of the most enticing benefits of sliding glass doors is their ability to create a seamless transition from Indoors to outdoors. Whether you’re hosting a summer barbecue or simply enjoying a quiet evening, these doors allow for a fluid flow between spaces. This enhances the functionality of your living areas, giving you the freedom to entertain or relax with ease.
Better Security Features
While roller doors can offer good security, modern sliding glass doors come equipped with advanced locking mechanisms and frame reinforcements that enhance safety. This makes them a viable choice for homeowners concerned about break-ins. The transparency of sliding glass also serves as a natural deterrent, making it harder for potential intruders to hide their actions.
Noise Reduction
Many sliding glass doors are designed with soundproofing features, which can significantly reduce external noise. This is particularly beneficial if you live in a busy neighborhood or near a noisy street. Upgrading to a sliding glass door can create a more peaceful indoor environment.
Easy Maintenance
Maintaining sliding glass doors is generally easier than caring for roller doors. A simple routine of cleaning and lubrication keeps them functioning smoothly. They often require less upkeep in terms of mechanical parts, as they don’t have the components that often break down in roller doors.
Step-by-Step Guide to Replacing Roller Doors with Sliding Glass Doors
Replacing a roller door with a sliding glass door may seem daunting, but with careful planning and execution, it can be a straightforward project. Follow this step-by-step guide:
Step 1: Measure Your Space
Before purchasing a sliding glass door, accurately measure the space where the roller door currently resides. Measure both the height and width, and check for any obstructions in the surrounding area that could impact the installation.
Step 2: Choose Your Door
Select a sliding glass door that suits your aesthetic preference and fits your measurements. Pay attention to energy efficiency ratings, security features, and design elements that align with your home’s architecture.
Step 3: Gather Your Tools
You will need essential tools including a measurement tape, screwdriver, and level. Depending on the installation method, you may also require additional tools like a saw and drill.
Step 4: Remove the Roller Door
Carefully remove the roller door. If it is a manual door, you will typically lift it off its tracks. For electric doors, disconnect any electrical components first. Properly dispose of the old door according to your local regulations.
Step 5: Prepare the Opening
Inspect the opening to ensure it is level and structurally sound. You may need to adjust the frame slightly or repair any damage incurred during the removal process.
Step 6: Install the New Sliding Glass Door
Follow the manufacturer’s instructions to install the new sliding glass door. Ensure that it is level and securely fastened. Adjust any hinges or tracks as necessary for smooth operation.
Step 7: Seal the Edges
Use weather stripping and caulk to seal any gaps around your newly installed sliding glass door. This will enhance its energy efficiency and prevent drafts.
Step 8: Test Operation
Finally, test the sliding mechanism thoroughly. Ensure that the door opens and closes smoothly and that all locking mechanisms function properly.
Tips for a Successful Transition
- Choosing the Right Door: Consider the dimensions and the overall décor of your home when selecting your sliding glass door.
- Professional Help: If you’re uncertain about your DIY skills, consider hiring a professional for installation.
- Weather Considerations: Check weather forecasts before beginning the project to avoid working in unsuitable conditions.
- Involve Family: This can be a family project that brings everyone together. Leaning on others’ strengths can make the process smoother.
- Post-Installation Care: Regularly clean and maintain your sliding glass door to keep it in optimal shape.
Common Mistakes to Avoid
When replacing a roller door with a sliding glass door, it’s essential to avoid these common mistakes:
Skipping Measurements
One of the most frequent issues arises from inaccurate measurements. Always double-check your dimensions before purchasing a sliding glass door.
Ignoring Energy Efficiency
Prioritizing style over energy efficiency can lead to increased heating and cooling costs. Always invest in energy-efficient designs to save in the long run.
Inadequate Sealing
Neglecting to properly seal the door can result in drafts, increasing energy costs and decreasing comfort levels.
Rushing the Installation
Take your time during the installation process. A rushed job can lead to misalignment and mechanical issues down the line.
Frequently Asked Questions
What is the average cost of replacing a roller door with a sliding glass door?
The cost varies based on the size and style of the sliding glass door. On average, you can expect to pay between $1,500 and $3,500, including installation. Always get multiple quotes to find the best deal.
Can I install a sliding glass door myself?
If you have basic DIY skills and the right tools, you can install a sliding glass door yourself. However, always read the manufacturer’s instructions and consider hiring a professional if you’re unsure.
Are sliding glass doors secure?
Yes, modern sliding glass doors come with advanced locking systems that enhance security. Ensure that you choose a reputable brand and verify features like multi-point locks.
How much light do sliding glass doors let in?
Sliding glass doors allow natural light to enter your home efficiently, brightening your space without compromising privacy.
What are the best materials for sliding glass doors?
The best materials for sliding glass doors include vinyl or fiberglass frames for durability and energy efficiency. Additionally, tempered glass provides added safety.
Conclusion: Embrace the Upgrade
Replacing a roller door with a sliding glass door is a worthwhile investment that can enhance your home in numerous ways. By understanding the benefits and following the steps outlined in this guide, you can transform your space into a brighter, more stylish environment. With careful planning, attention to detail, and proper installation, you can enjoy the many advantages of your new sliding glass door for years to come. Embrace this upgrade to not only increase your home’s value but also to enjoy the wonderful ambiance it brin

 DIY Closet2 years ago
How to troubleshoot and reset the red light on your Aquaguard AG 3000E

 DIY Closet2 years ago
How to Install a Drop-In Sink Without Clips: A Step-by-Step Guide

 Bug Fixing2 years ago
Understanding the Cost of Furnace Collector Box Replacement: What to Expect

 DIY Closet2 years ago
Pergola Design: Understanding the Maximum Span for 6×6 Beams

 DIY Closet2 years ago
The Best Nails for Luan: A Comprehensive Guide

 Bug Fixing2 years ago
Pigtail vs Daisy Chain Outlets: Which is Better for Your Home?

 DIY Closet2 years ago
How to Build a Free Standing 6×6 Post Swing Set: A Step-by-Step Guide

 DIY Closet2 years ago
Understanding the Benefits of a 400 Amp Meter Base with Two 200 Amp Disconnects


